中文版:在Kubernetes中部署Cloudflare Tunnel – Frank’s Weblog
Cloudflare Tunnel is a tunneling service provided by Cloudflare. With Cloudflare Tunnel you can connect the origin to Cloudflare and provide service without exposing any ports on the server or cluster, therefore minimizing the attack surface.
Cloudflare Tunnel was formerly known as Argo Tunnel. Later Cloudflare Tunnel became part of the Cloudflare Zero Trust and became available to all users for free in 2021[1].
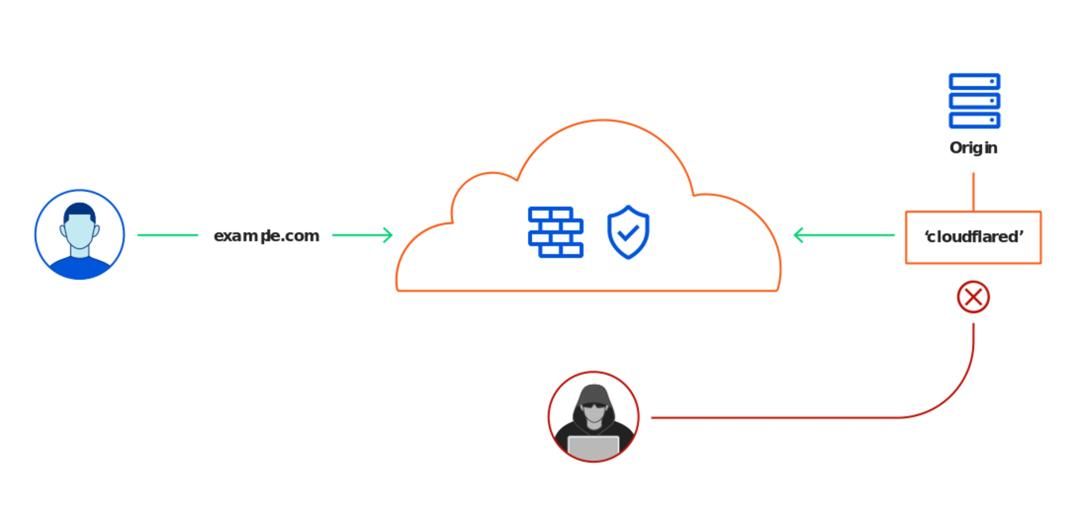
Cloudflare Tunnel had several iterations in the past two years, many tutorials on the internet have become outdated. The latest Cloudflare Tunnel needs no configuration on the client (cloudflared) side besides token. All sites (services) can be configured on the Cloudflare web console. If a tutorial asks you to configure the site on Cloudflared through yaml, the tutorial is likely outdated.
This post will use httpbin as an example to illustrate how to deploy Cloudflared on Kubernetes and serve other services deployed on the cluster.
Configure Kubernetes Deployment and Service
This is a sample yaml that includes the Deployment and Service for httpbin. We created a Service named httpbin-svc, and expose port 80 through ClusterIP.
apiVersion: apps/v1
kind: Deployment
metadata:
  name: httpbin
spec:
  selector:
    matchLabels:
      app: httpbin
  template:
    metadata:
      labels:
        app: httpbin
    spec:
      containers:
      - name: httpbin
        image: kennethreitz/httpbin
        imagePullPolicy: Always
        ports:
        - containerPort: 80
      restartPolicy: Always
      terminationGracePeriodSeconds: 60
---
apiVersion: v1
kind: Service
metadata:
  name: httpbin-svc
spec:
  type: ClusterIP
  ports:
    - targetPort: 80
      port: 80
  selector:
      app: httpbin
Install Cloudflared
Go to the Cloudflare Tunnel console (Zero Trust console -> Access -> Tunnels) and create a new Tunnel.
After creation, the following page will be shown. Take note of the token, which will be used later.
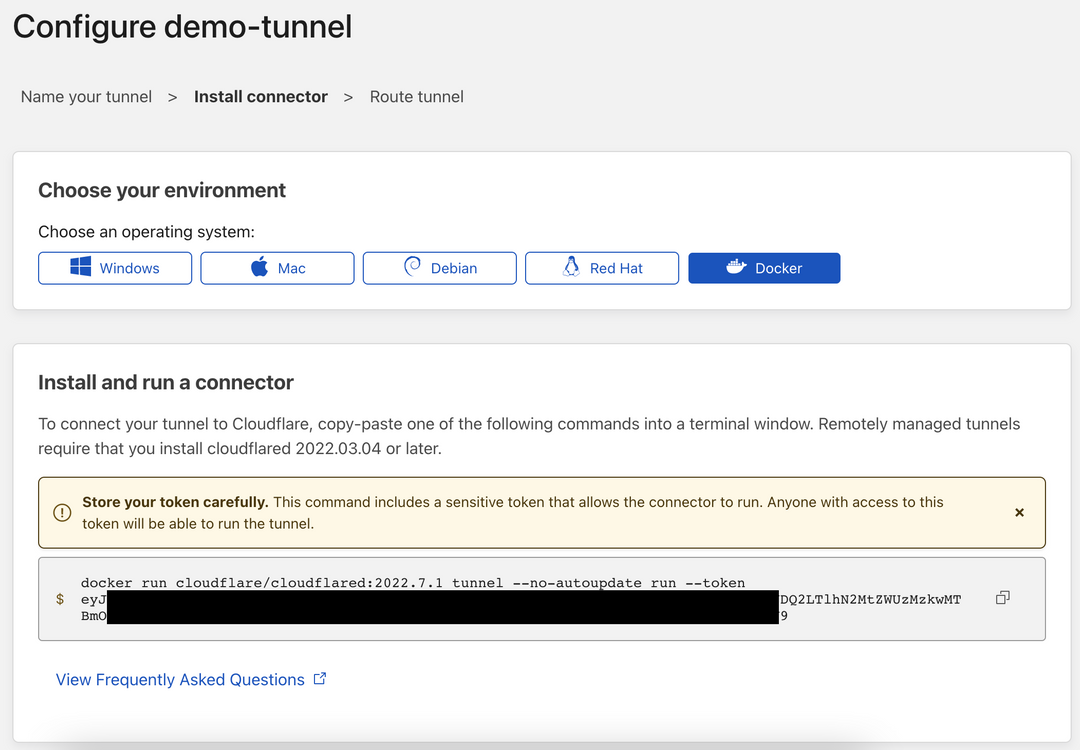
This is a yaml for cloudflared. Replace the {token}with the token shown on the web console. The official cloudflared image (cloudflare/cloudflared) supports amd64/arm64 Multi-arch starting from version 2022.12.0. If you need to run it on architectures other than amd64 and arm64, you can use an image built by a 3rd party: ghcr.io/maggie0002/cloudflared or build your own image.
apiVersion: apps/v1
kind: Deployment
metadata:
  labels:
    app: cloudflared
  name: cloudflared
spec:
  selector:
    matchLabels:
      app: cloudflared
  template:
    metadata:
      labels:
        app: cloudflared
    spec:
      containers:
      - name: cloudflared
        image: cloudflare/cloudflared:2022.7.1
        # image: ghcr.io/maggie0002/cloudflared:2022.7.1
        imagePullPolicy: Always
        args: ["tunnel", "--no-autoupdate", "run", "--token={token}"]
      restartPolicy: Always
      terminationGracePeriodSeconds: 60
Note that in the command provided on the Cloudflare console, there’s space instead of an equal sign(=) after the --token flag. When using it in Kubernetes it must be an equal sign, otherwise cloudflared will raise an error.
Storing the token in the yaml file is not secure. To ensure security you can store the token in the Kubernetes Secret and use it via the environment variable. See Secrets | Kubernetes for detailed instruction.
Configure Hostname
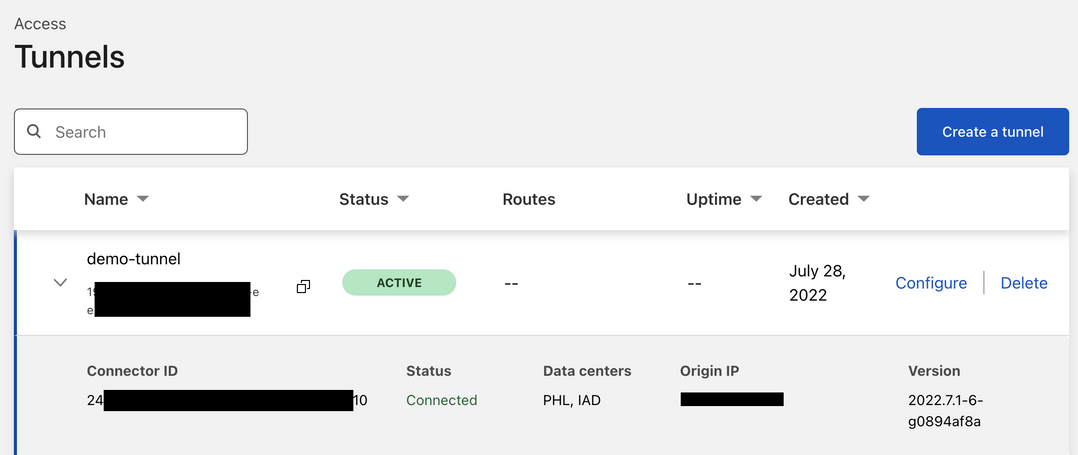
The status will change to Active after cloudflared started. Click Configure to configure the Tunnel.
Create a new Public Hostname, and select the domain that you would like to use to provide service. Fill in the name and port of the Kubernetes Service in the Service section.
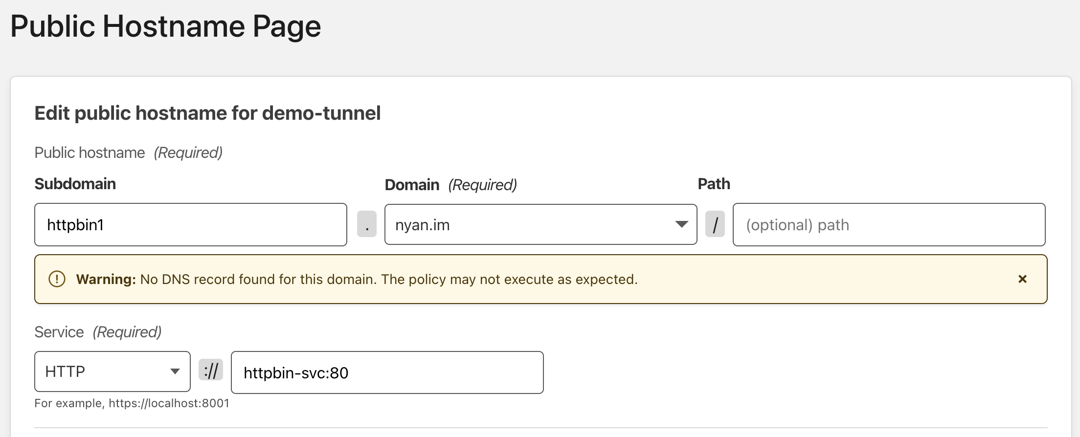
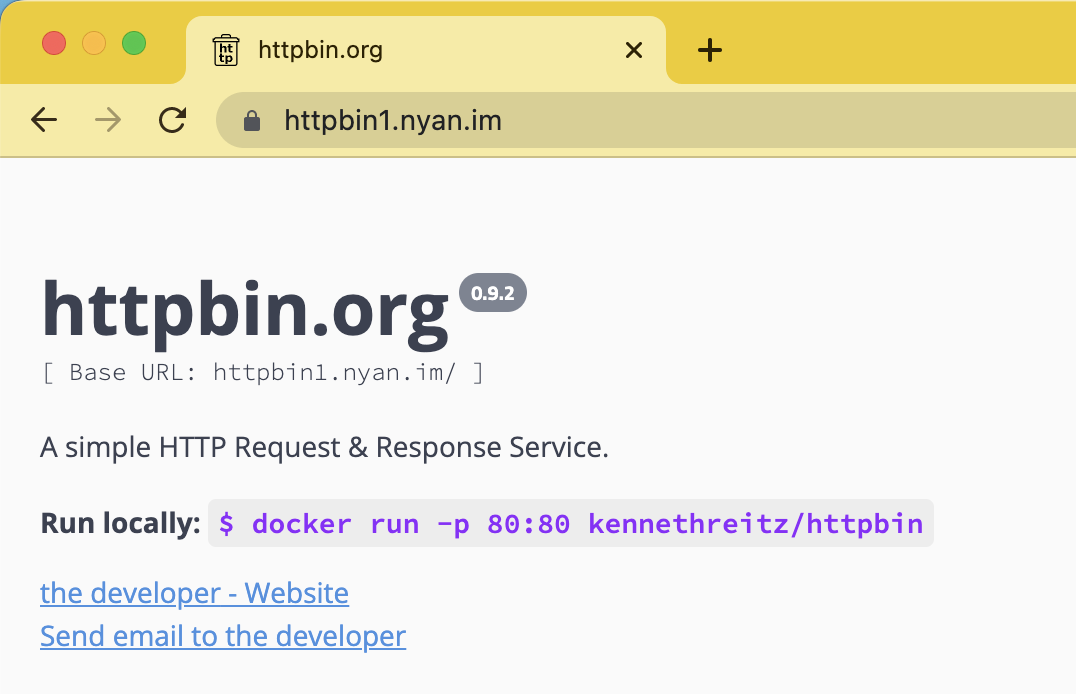
The service can be accessed from the selected domain.

发表回复/Leave a Reply