Contents
中文版:使用喷漆罐实现最佳DIY汽车喷漆效果的完整指南 – Frank’s Weblog

Background
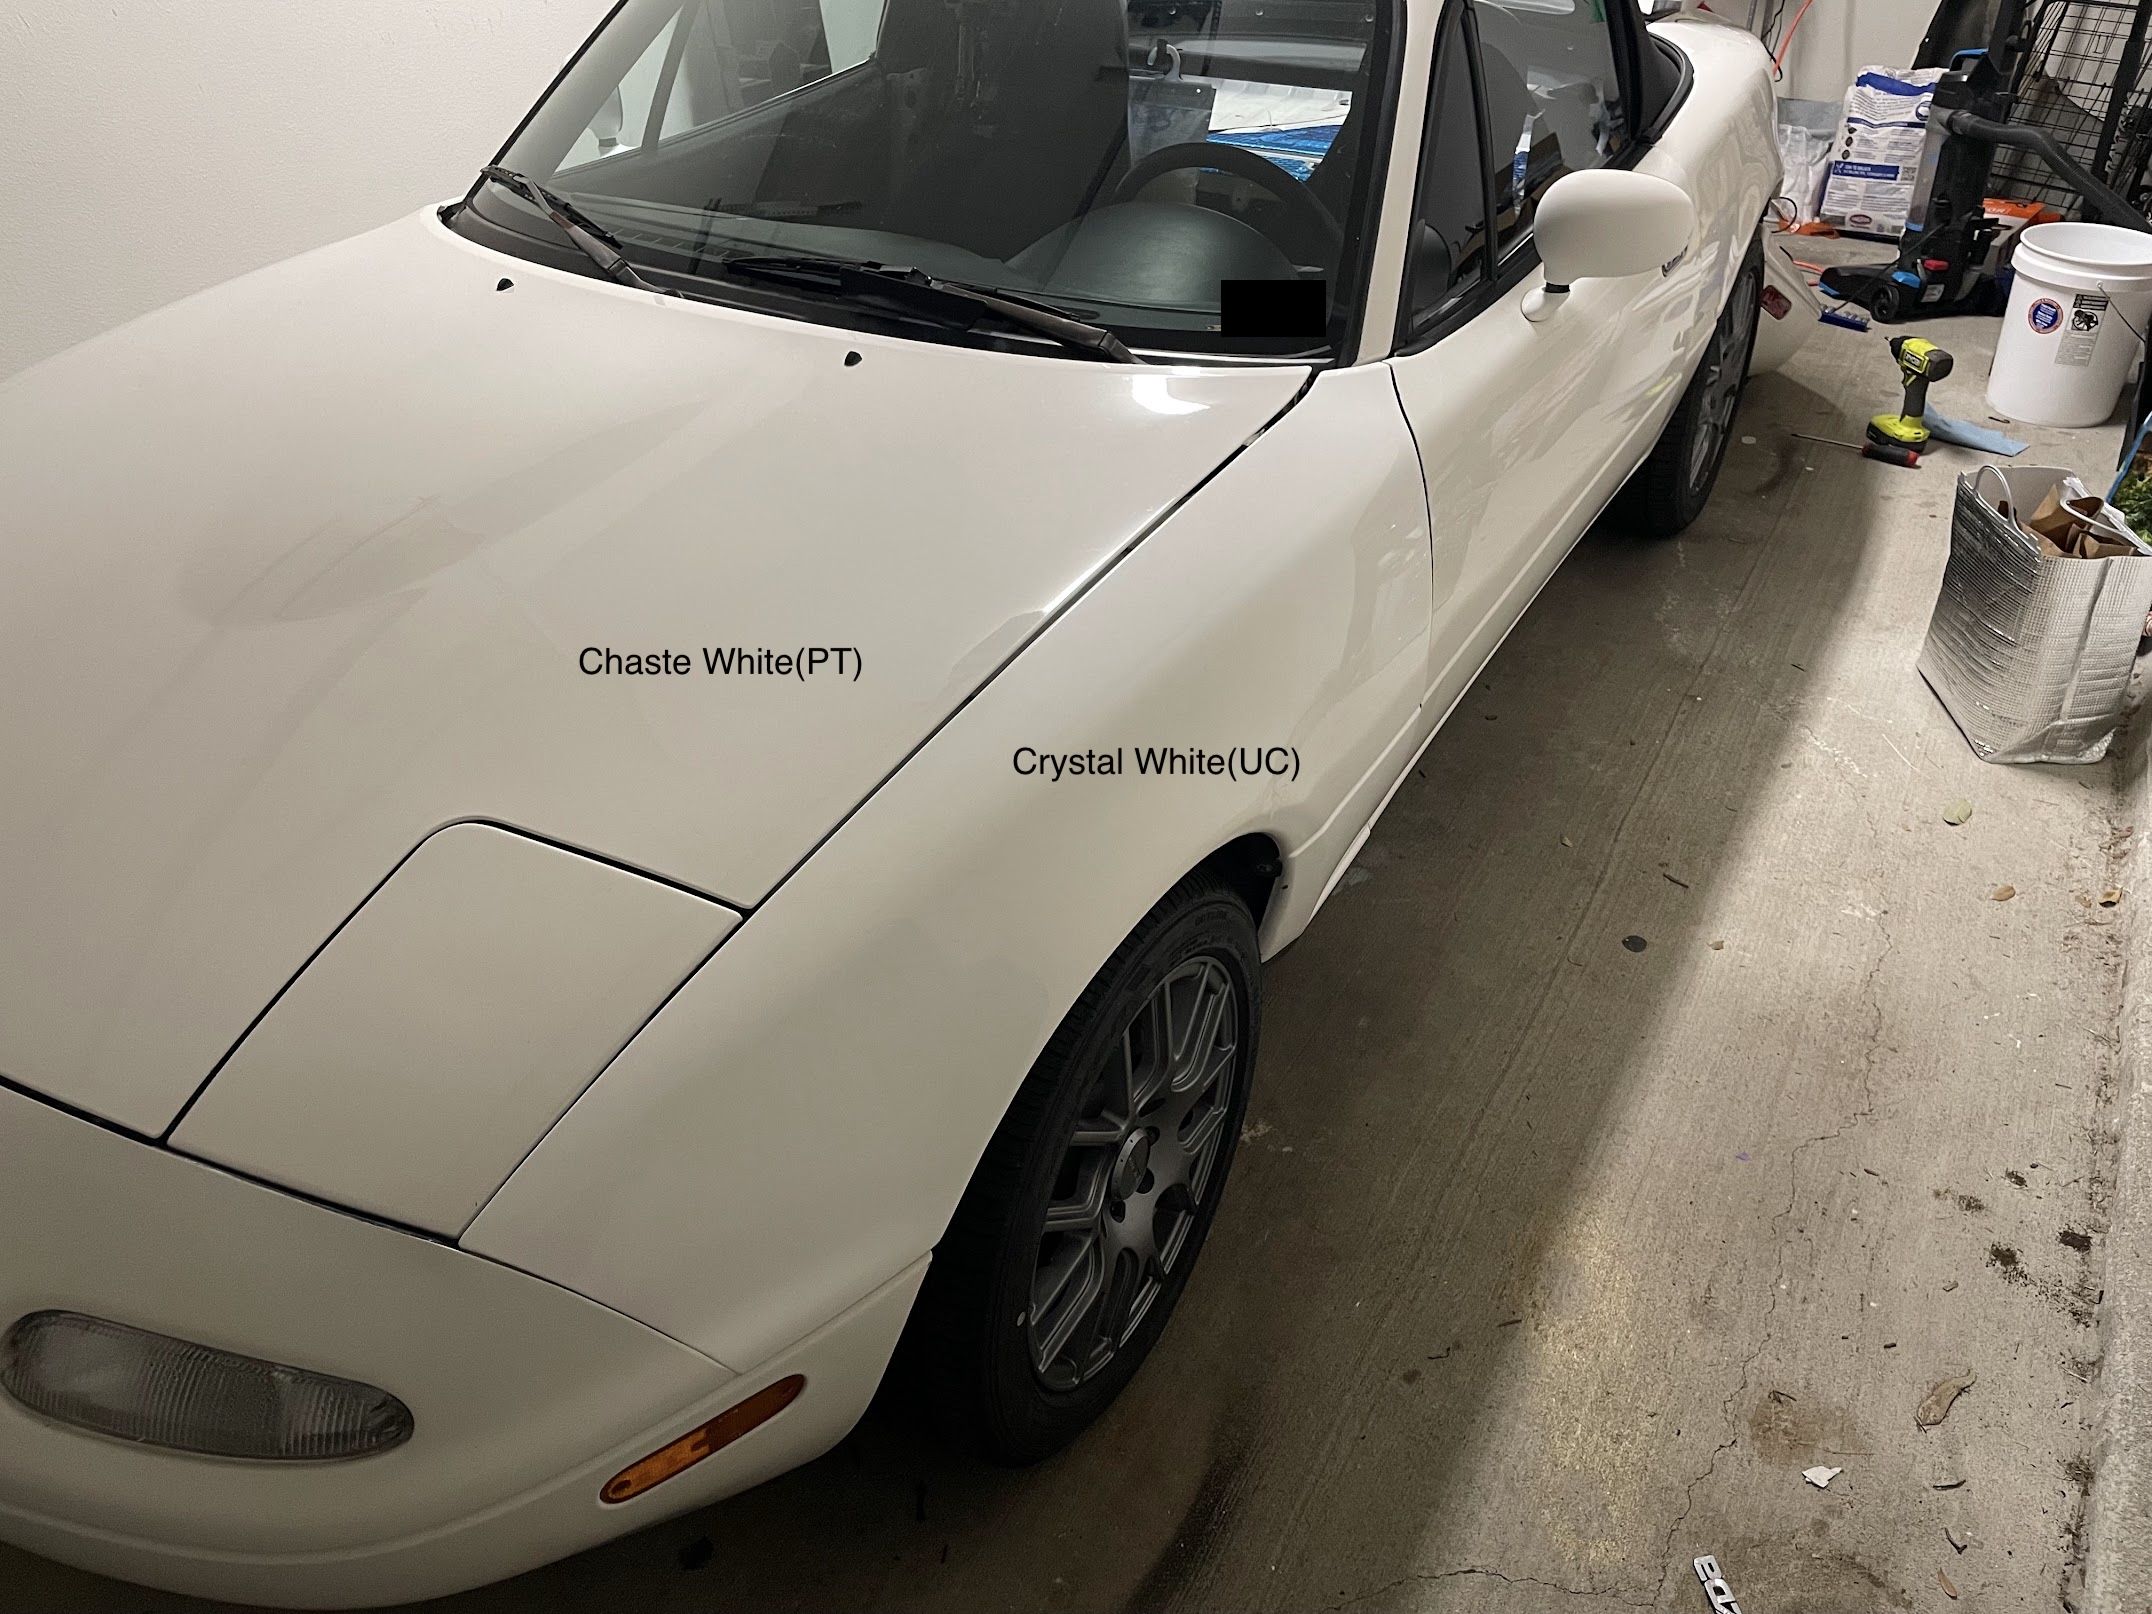
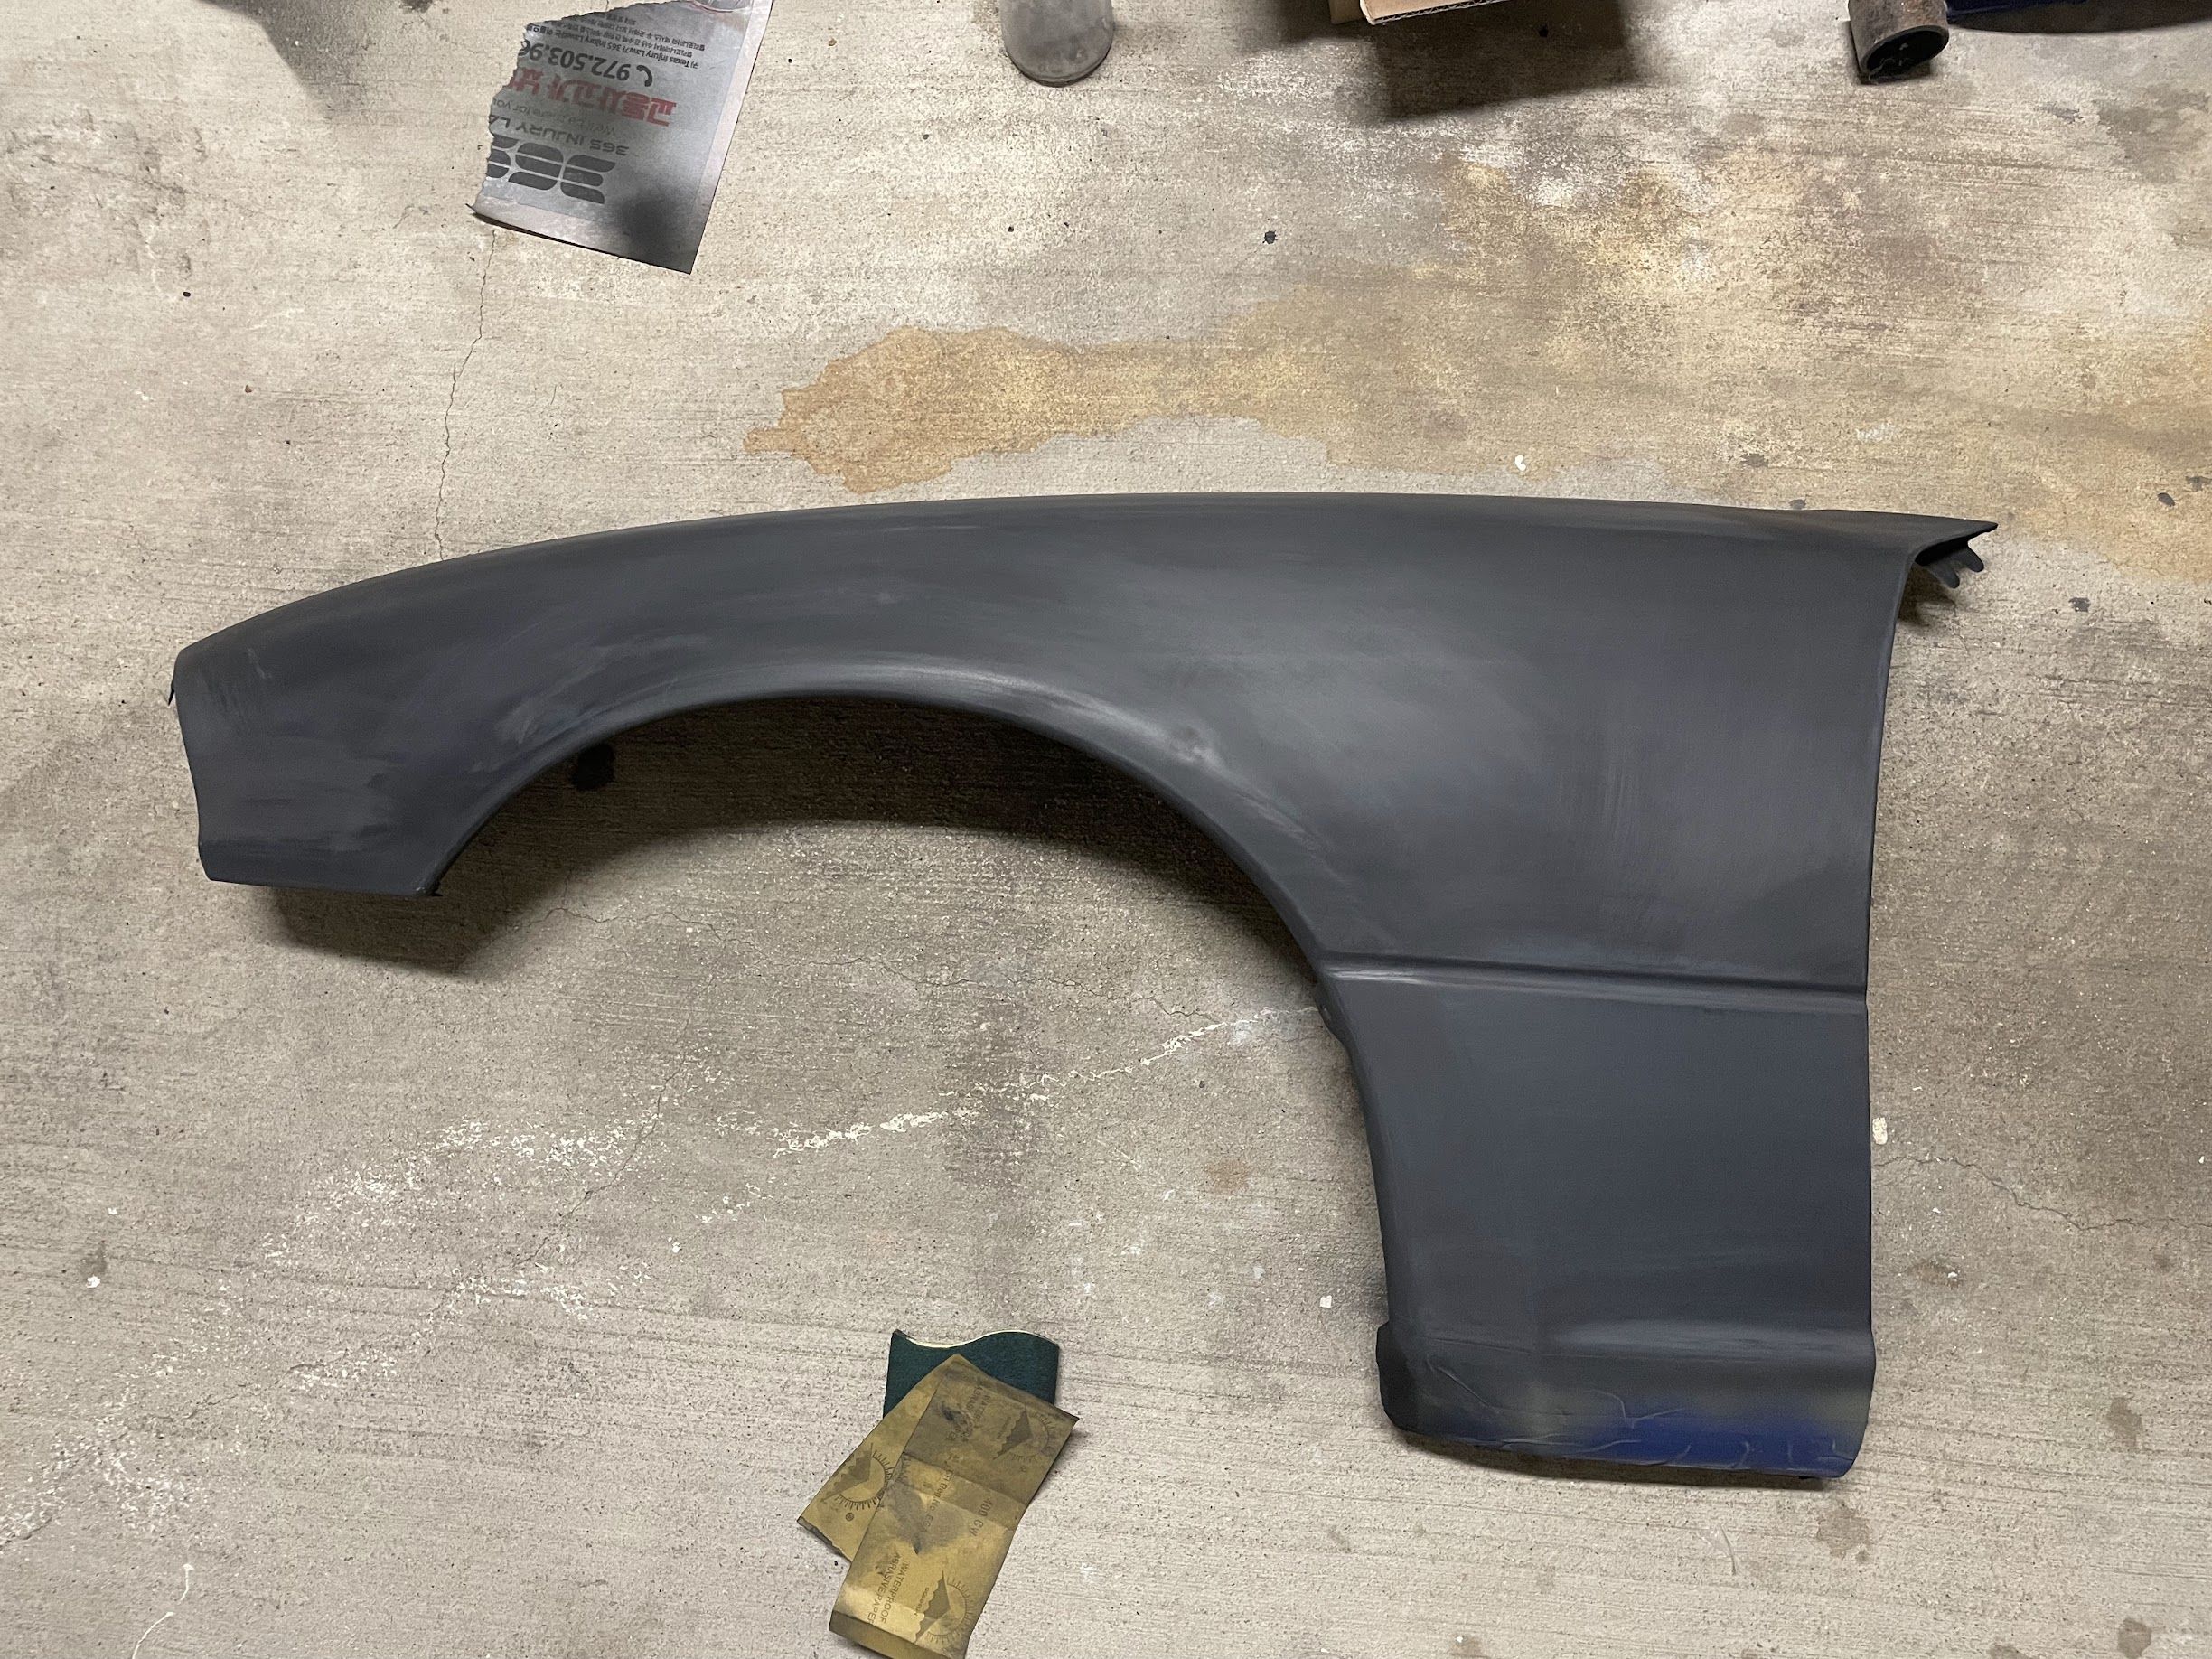
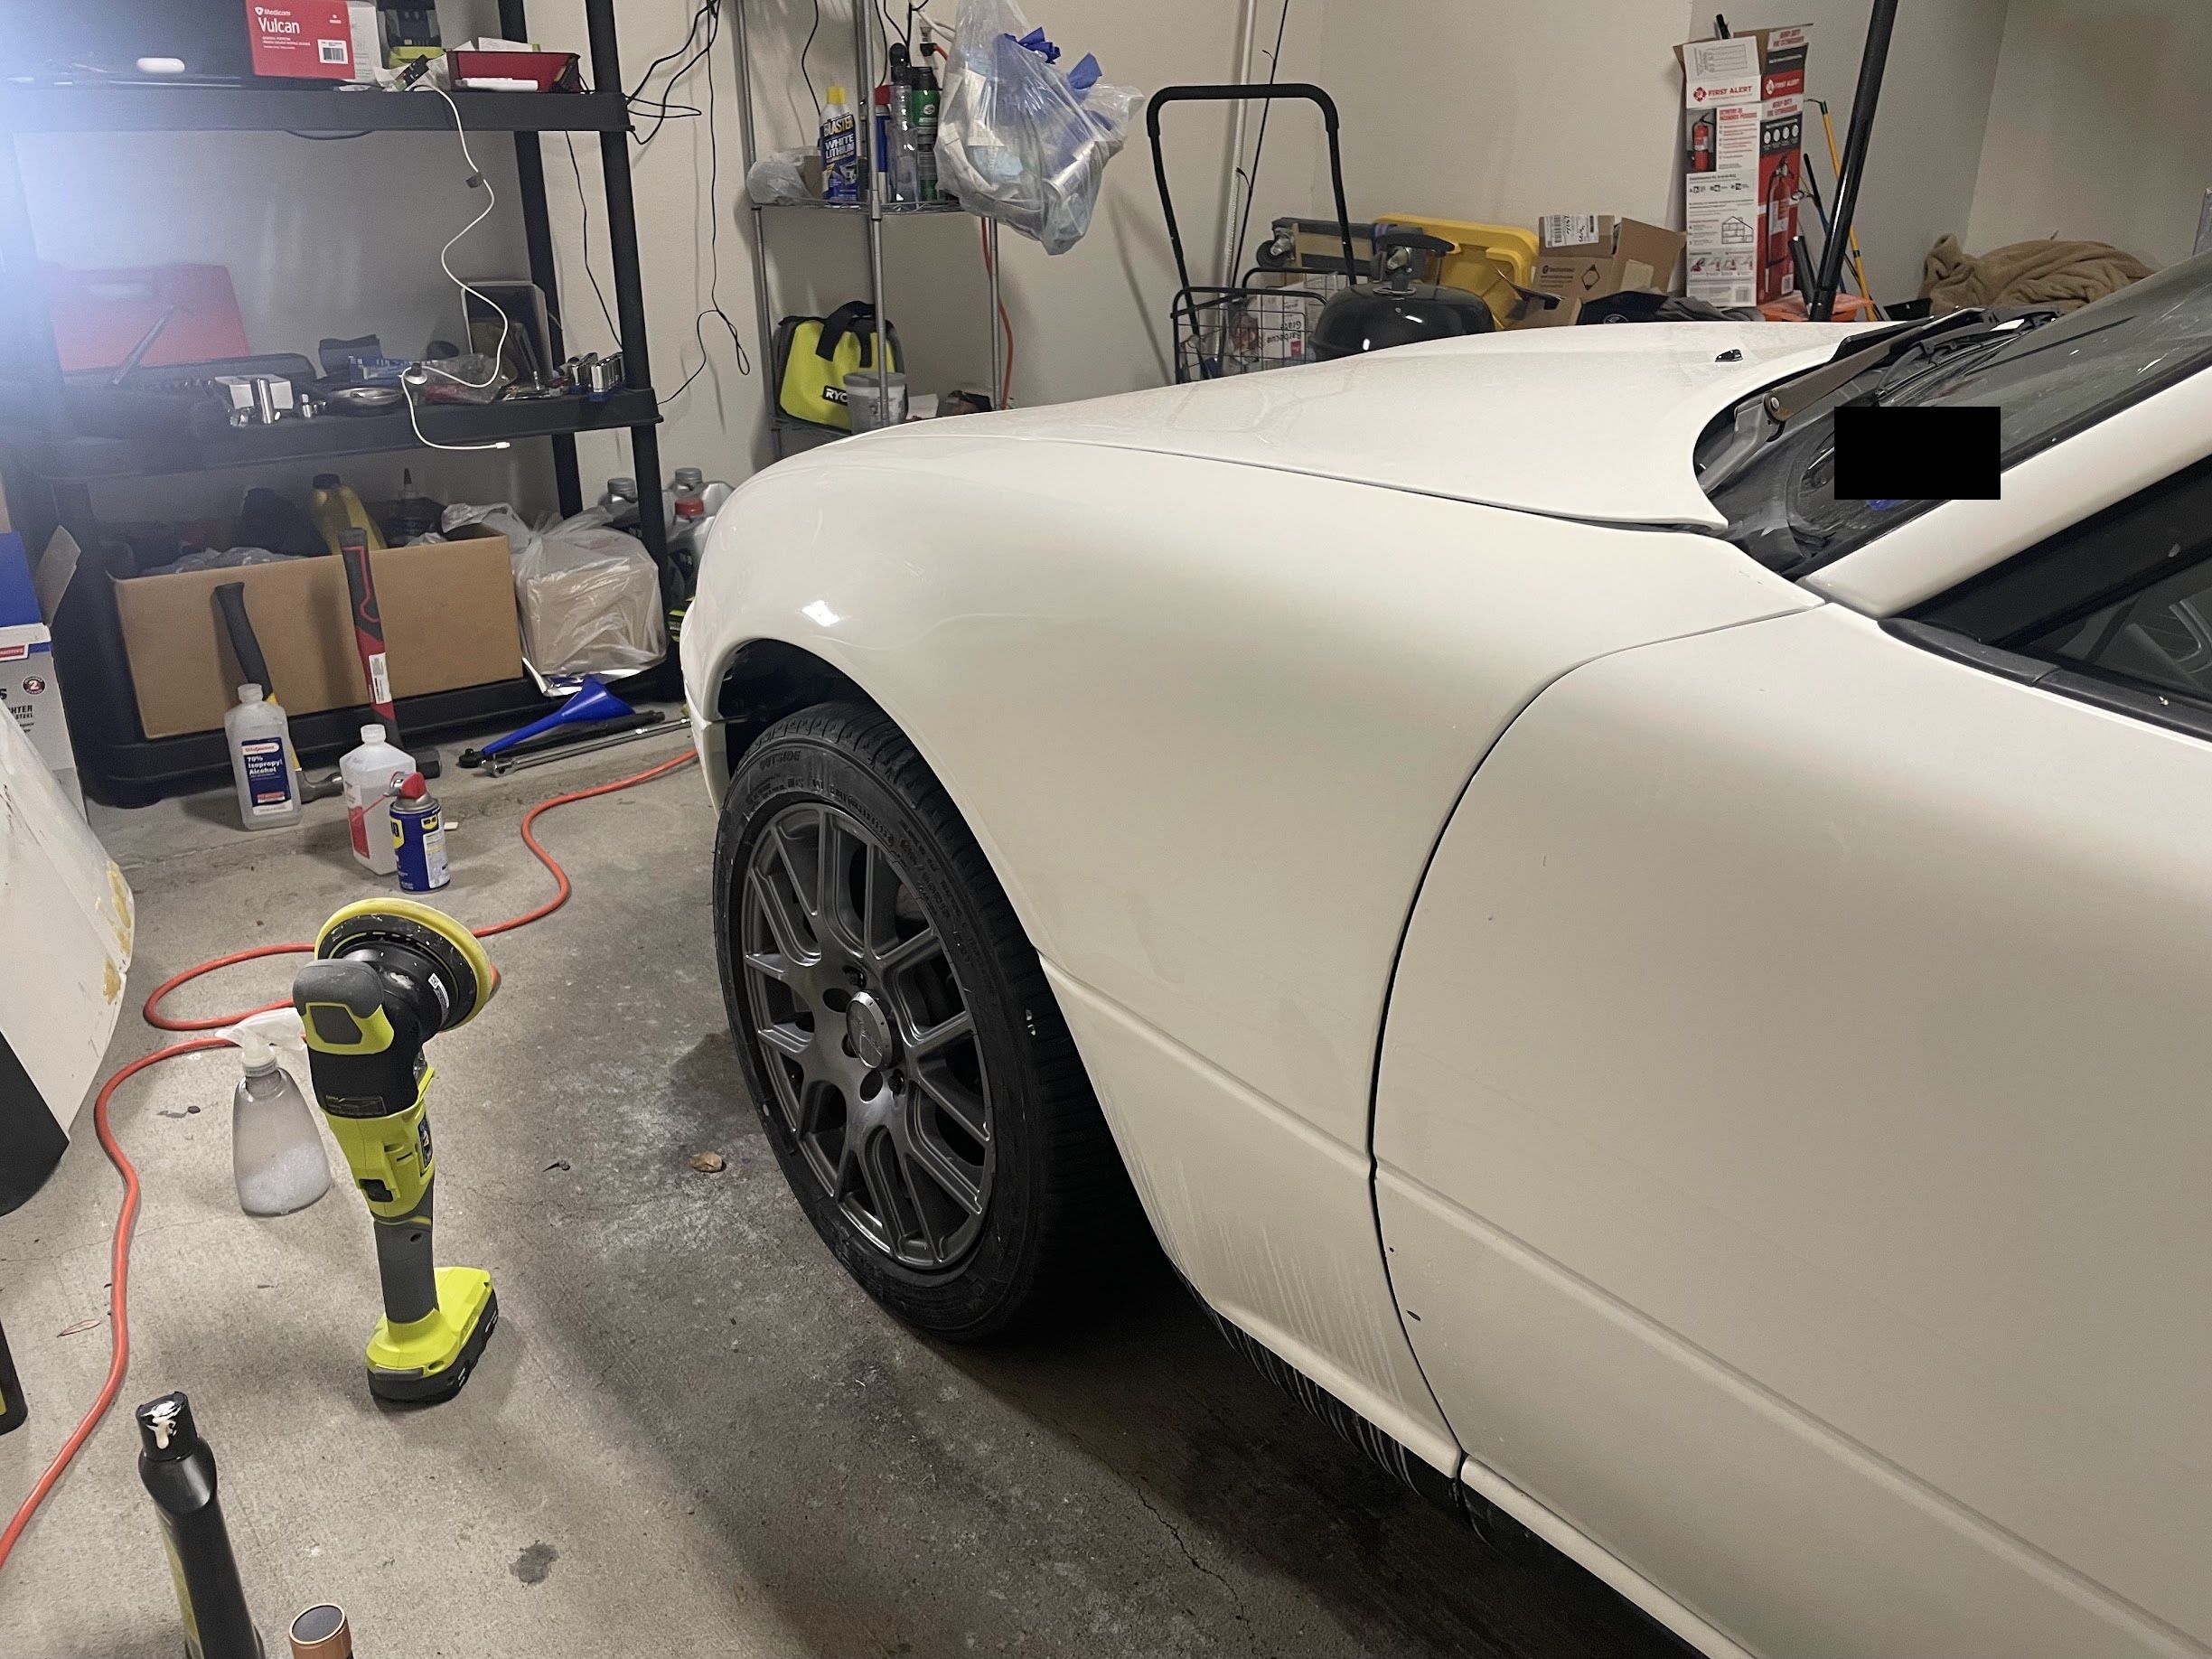
One of the fenders on my Miata was damaged by the previous owner, so I replaced it with a junkyard part. However the junkyard part has significant color difference with rest of the car. I found out the white color on NA6(1990-1993) and NA8(1994-1997) are two different white: NA6 is Crystal White(Color code: UC), which is brighter, while NA8 is Chaste White(Color code: PT), which is “milkier”.
After completing the paint correction on the entire car, I repainted the fender. The outcome was great, but there were all kinds of problems throughout the process.
There are all kinds of automotive paints on the market, the marketing strategies of the manufacturers make it even more complicated. Beginners can easily get confused and choose the wrong product or the wrong method of application. Furthermore, unlike mechanical repairs, painting doesn’t have a strict procedure to follow, each tutorial on the web has it’s own style. The material, the application process, and even environment can make the outcome drastically different.
In this article, I will use the fender on my Miata as an example, to illustrate the basics of paint, the different types of paint, application process and common problems. This article will focus on using aerosol cans and common household tools to achieve the best results possible. Professional application and equipments are not in the scope of this article.
This article is based on my personal research and experience, and is not a professional tutorial, the content may be mistaken. When using paint product with toxic contents, please use proper personal protective equipment (PPE) and follow the guidelines of recycling and disposal.
Glossary
Touch Up Paint: Paint used for small-scale repairs or touch-ups. Usually sold in touch-up pens, small bottles, or aerosol cans.
Primer: The initial coat applied to a surface before the base coat. Primer ensures better paint adhesion, improves durability, and provides additional protection for the underlying material, such as rust prevention.[2]
Basecoat: As the name suggests, the base coat provides the visible color of the paint job.[2]
Clearcoat: A glossy, transparent coating that is applied over the color coat. The clearcoat protects the paint from scratches, degradation from chemical substances and ultraviolet.[2]
VOC(Volatile Organic Compounds): Organic chemicals that evaporate into the air at room temperature. An example is the organic solvents in paint products. VOCs pose significant hazards to both human health and the environment.[2]
Single Stage: A type of automotive paint that combines color and the glossy protective layer into a single product. Unlike the modern basecoat/clearcoat system, single stage paint does not require a separate clearcoat. It was common on older vehicles from the last century. For example, Mazda Miata NA used single stage paint for most of its colors.
Acrylic: A polymer (resin) used as a binder in paints. It is a versatile chemical component used to manufacture various types of paint. For this reason, the word “Acrylic” is almost always paired with another term to specify its exact type, such as Acrylic Enamel or Acrylic Lacquer. Trivia: Both acrylic glass and acrylic pigments are synthetic compounds derived from acrylic acid.
1K (one-part / one-component): The “K” stands for the German word Komponente (component). 1K means “one-component” and refers to a coating that does not require a hardener, catalyst, or activator to cure.[4]
2K (two-part / two-component): 2K means “two-component.” A 2K clearcoat, for example, is a type of polyurethane paint that requires a hardener to be mixed into the base resin before application. The two parts undergo a chemical reaction to cure. 2K systems can achieve a higher gloss, better durability, and faster curing times than 1K products. The core difference between 1K and 2K is the hardener, but the differences are not limited to that alone. This key difference results in vastly different curing mechanisms and methods of interaction with underlying paint layers.[4]
Categories of Automotive Paint
The naming conventions for common automotive paints on the market are a mix of technical terminology, historical legacy, and marketing strategies. The terminology for automotive paints has been driven by the progression of technologies and by the desire to both distinguish new technologies and relate to previous technologies for the same purpose.[2] This is further complicated by each brand having its own unique product lines and naming systems, which can make it even more confusing for consumers.
These are the common paints in the consumer market. Note that these categories are not necessarily at the same level so they are not mutually exclusive. For example, modern automotive paint in manufacturing is Water based acrylic polyurethane enamel[2][7], which belongs to basically all the categories listed below.
Acrylic Lacquer
Acrylic lacquer is a one-component (1K) paint that uses strong, fast-evaporating organic solvents, such as acetone, as the main carrier for the acrylic resin.
The word “lacquer” is ambiguous. Searching for the term online produces diverse results. In the case of “acrylic lacquer,” the term specifically denotes the curing process, of rapid volatilization of its solvent. As the solvent evaporates, the solid acrylic resin remains, creating a hard finish.The dry-to-touch and cure times for acrylic lacquer are exceptionally fast. A key characteristic, however, is that a fully cured acrylic lacquer finish can be reactivated upon exposure to organic solvents. Therefore, it is susceptible to attack from substances like gasoline. If you used acrylic lacquer clear coat, do not clean the finish with alcohol, otherwise you’ll have to redo the entire paintwork.
Acrylic lacquer was historically a common automotive paint because it is easy to apply, dries quickly, and can be polished to a high gloss. Due to environmental regulations and the emergence of more durable paint, its use in new car manufacturing and professional paint shops has significantly decreased. Today, the most common type of paint found in household DIY spray cans is acrylic lacquer, such as Dupli-Color’s Perfect Match series.
Enamel[1]
Enamel is a type of paint that cures to form a hard, smooth, and durable finish. The vast majority of commercially available enamels are 1K (one-component) paints, whose key characteristic is the formation of a hard shell after curing, providing excellent protection, and creates a smooth and glossy finish. The disadvantages of enamel are its typically long drying time and its tendency to oxidize and yellow over the long term.
The naming of “enamel” has evolved with technological advancements. Previously, the term “enamel paint” was used to describe a class of high-gloss, oil-based paints. Today, the word refers to a “durable, high-gloss finish,” often with an implication of being a “higher-quality product.” It functions more as a marketing strategy rather than a precise description of its chemical composition or mechanism. A common product example is acrylic enamel.
Urethane / Polyurethane
In practice, the terms “Urethane” and “Polyurethane” are often used interchangeably.
Urethane is the gold standard in modern automotive paint technology. It is a two-component (2K) paint, consisting of a base resin and a hardener/activator. When the two are mixed, the paint cures and form a durable finish through chemical reaction.
Because it cures through a chemical reaction, the finish is extremely durable. It effectively resists physical and chemical damage from substances like gasoline, chemicals, and bird droppings. Furthermore, it possesses excellent UV resistance, allowing it to maintain a vibrant color for a long time without fading.
Another advantage of chemical curing is the speed, which is particularly important for professional paint shops that have high demands for turnaround speed and delivery times.
Waterborne[3]
Water-based paint uses water, instead of organic solvents, as the main carrier of acrylic resins. After applied, the water evaporates, and the polymer particles coalesces and form a film.
Another advantage of water-based paint is its lower VOC (Volatile Organic Compounds) and lower environmental pollution. Therefore, under increasingly strict environmental regulations, water-based paint has become more and more common in the automotive manufacturing industry.
Besides industrial applications, a growing number of water-based paints are also appearing in household DIY products. For example, most of the color paint products from touchupdirect.com are water-based.
Choosing Products
Primer
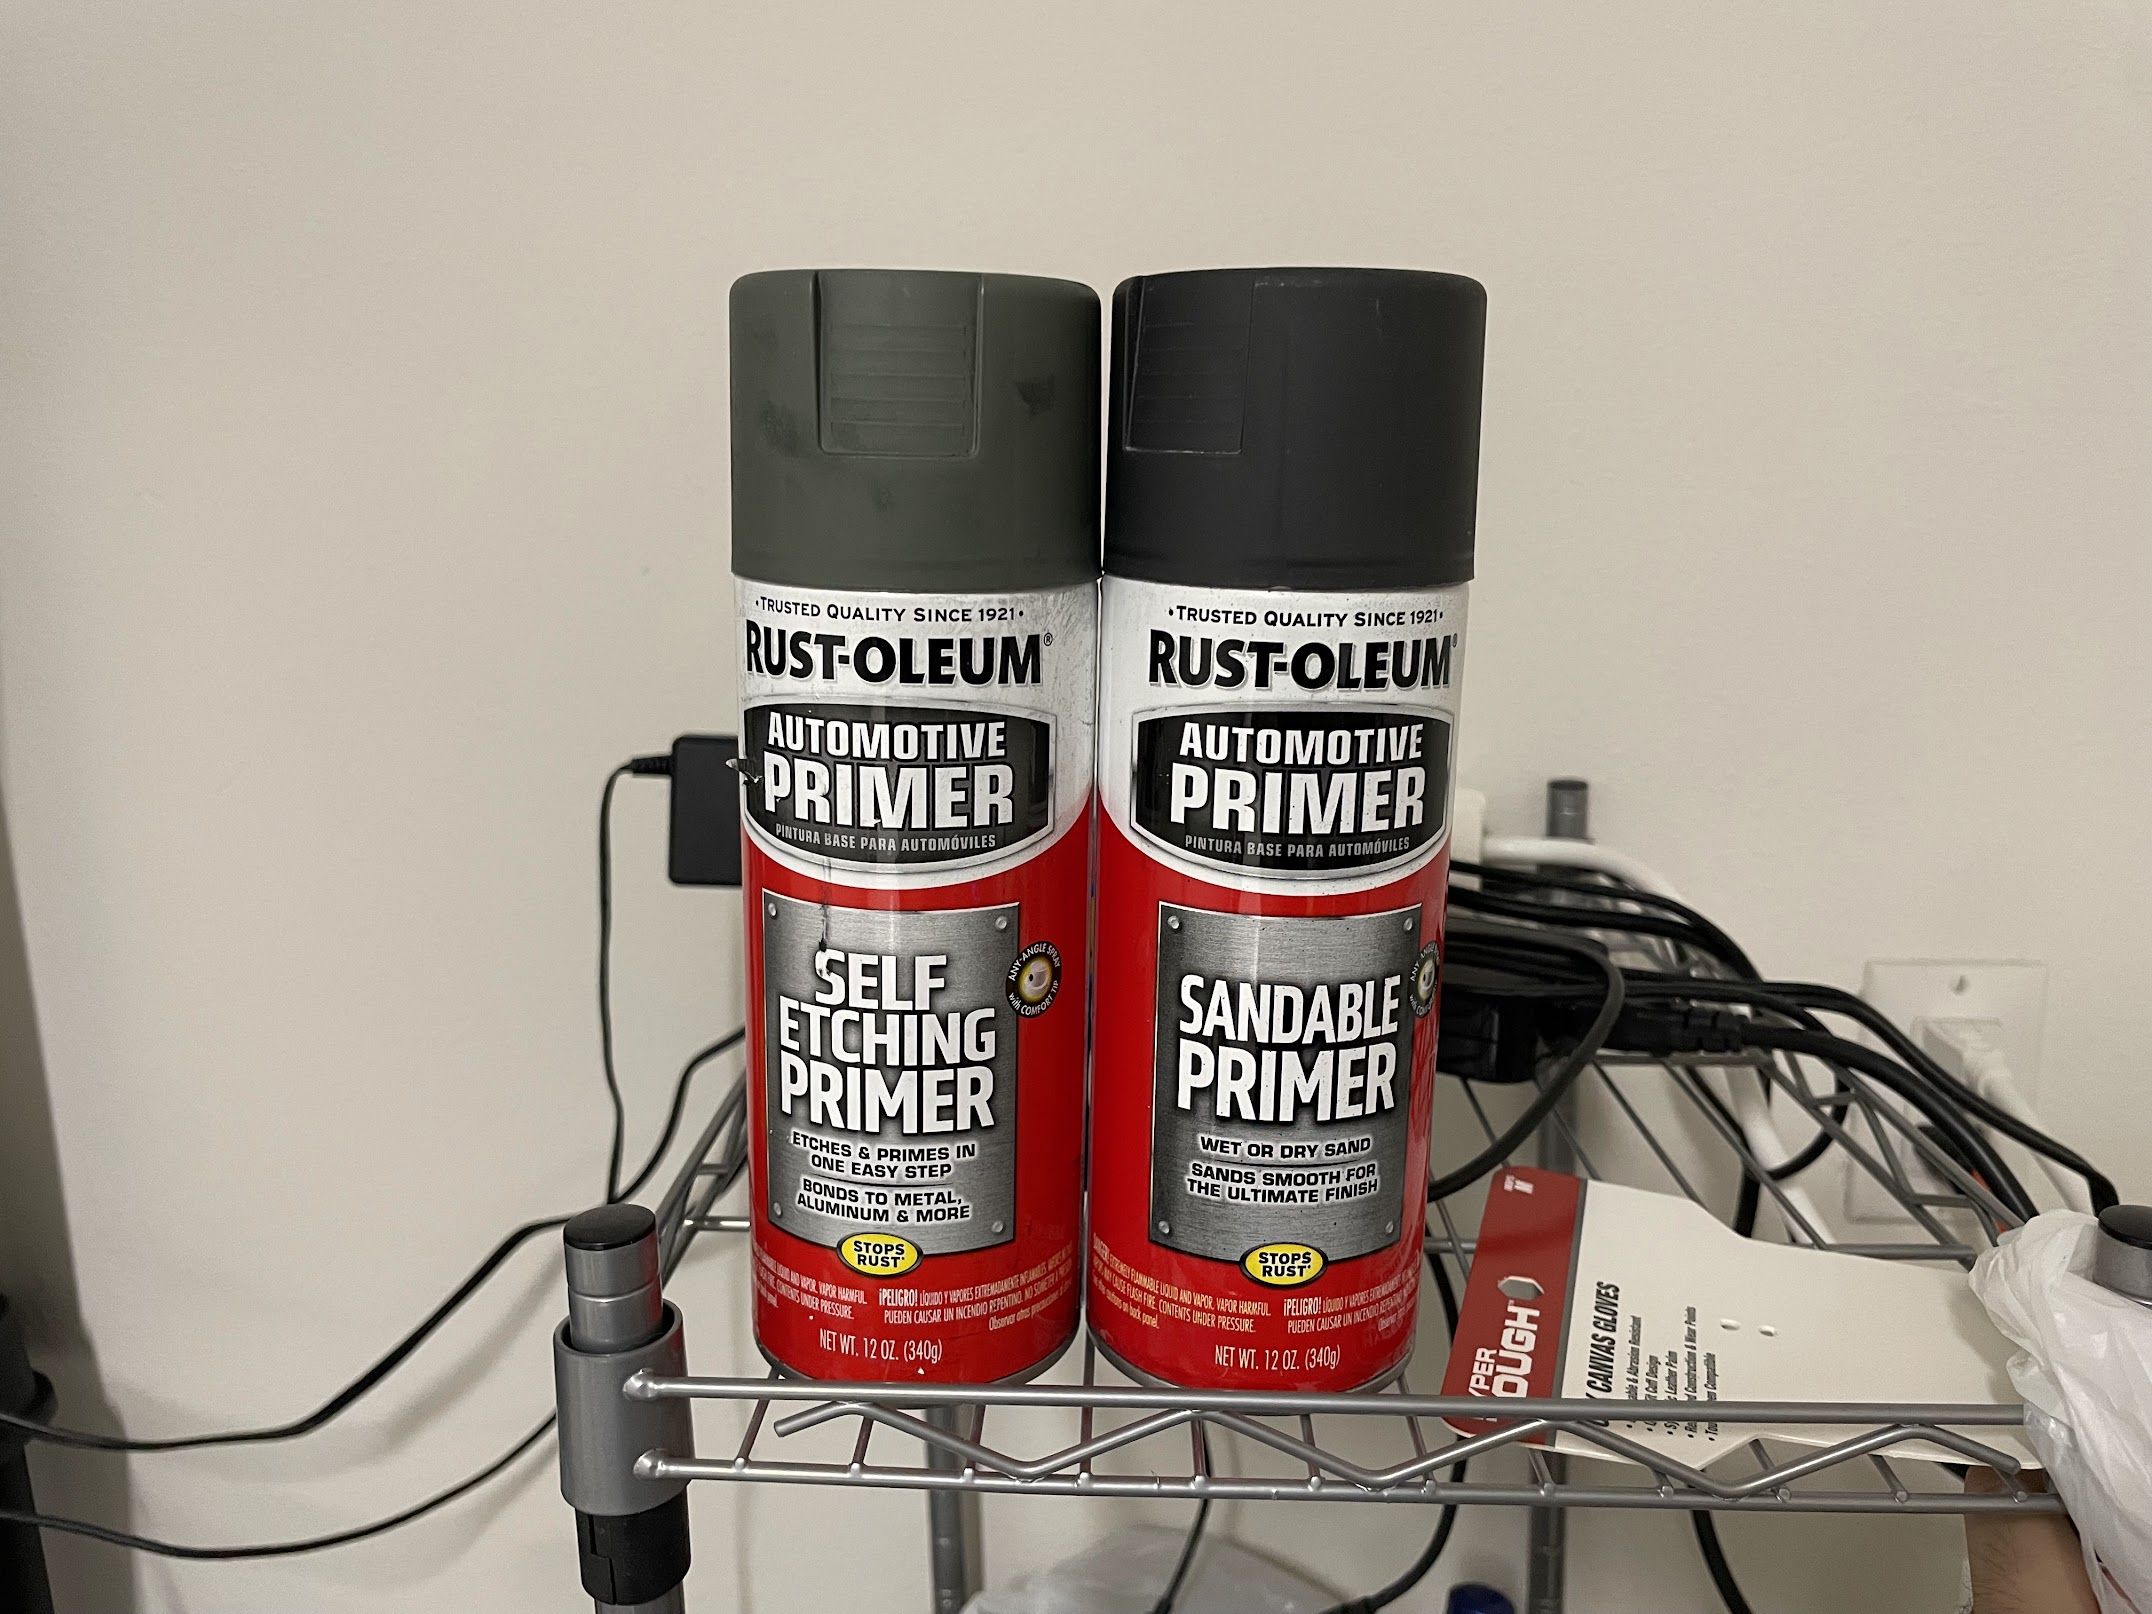
Using the most common brand Rust Oleum as an example, common automotive primers are:
- Etching Primer(Left): Usually used on bare metal. Etching Primer bites to the metal through a chemical reaction, to achieve better adhesion.
- Filler Primer: Usually used on filler, to cover the minor imperfections in the filler.
- Sandable Primer(Right): From my understanding, it’s a “general purpose” primer. I usually use it to spray over the original factory primer in areas that haven’t been sanded down to the bare metal.
Besides this, there is also a 2K primer called Epoxy Primer. Epoxy primer usually has better adhesion and excellent corrosion-resistant properties, but I haven’t used it.
Color Coat / Base Coat
First of all, you need to find the color code of your car, in most cases, the color code is on a metal plate on the body by the driver’s door. For example, my Miata’s color code is PT.

With the color code, the easiest way to get color paint is buying DupliColor at AutoZones. You can search by year, make, model and color code using the brochure at AutoZone stores, or DupliColor website.
If DupliColor doesn’t carry the color you need, you can find the websites that sells touch up paint. I’ve been buying color paints at touchupdirect.com, it has been a good experience so far.
Most color coats are Acrylic Lacquer or waterborne, and they are generally straightforward.
Clear Coat
1K Clear
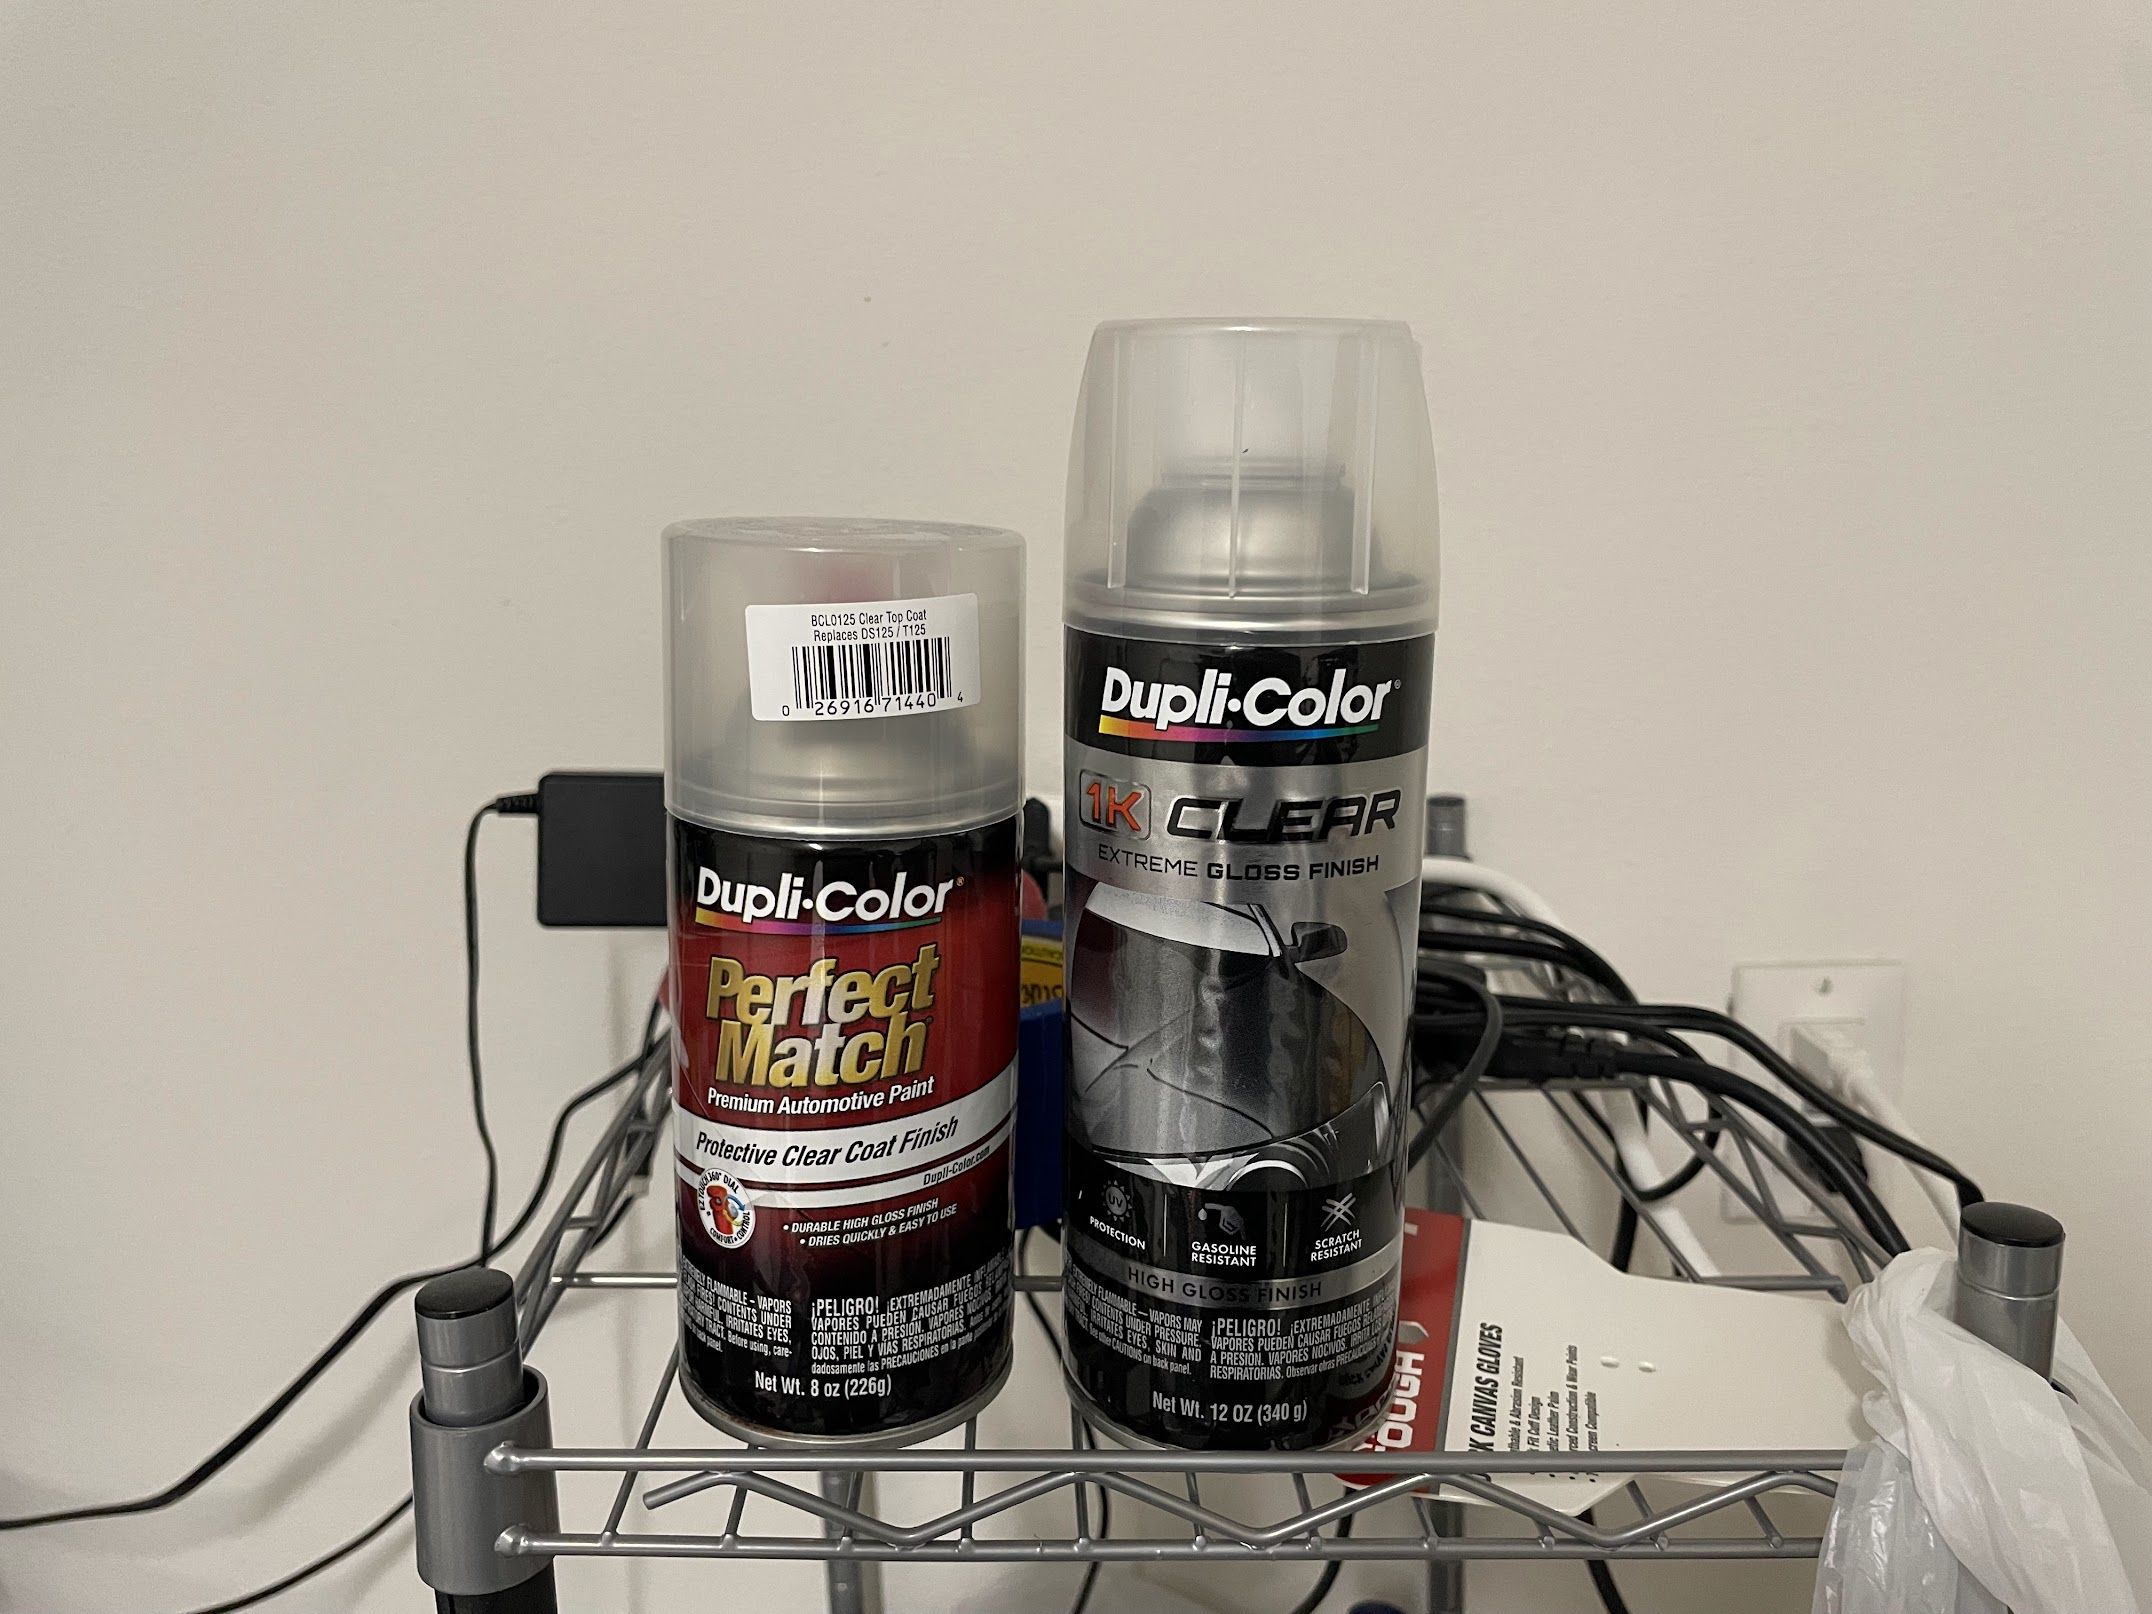
The clear coats in the picture are two most common clear coat product in AutoZones. Only the right one mentions “1K clear”, so, is the left one also 1K clear?
The answer is yes, both clear coats in the picture are 1K clear coats. As mentioned earlier, 1K is a very broad concept, referring to all “one-component” paints. Both the common Acrylic Lacquer (left in the picture) and Acrylic Enamel (right in the picture) are 1K paint. The “1K” label on these products is more for marketing purposes, and the fact that these two paints belong to different product lines has led to inconsistent naming.
I had previously mistaken the “1K” clear coat on the right for a more high-end product than the “regular” clear coat on the left, but that is not actually the case. However, it is true that enamel provides a harder finish and better chemical resistance than lacquer, but these characteristics are not directly related to it being “1K.”
I used the “1K” clear coat on the right for my first spray painting project and ran into significant issues, which I will detail below.
2K Clear
Safety Issue of 2K Clear Coats

WARNING: 2K clear coats contain the toxic substance isocyanate. However, not all spray can labels clearly indicate this. Please ensure you read and understand the product instructions and wear appropriate personal protective equipment (PPE) during application.
You should at least have these personal protective equipments:
- Full face or half face 3M respirator
- NIOSH Approved cartridges that filters Organic Vapor
- Safety goggles, if you have half face respirator
- Long sleeve, long pants, hat
- Gloves
If wearing the personal protective equipment properly, you should not smell any paint during application. If you do smell or taste paint, leave the contaminated area immediately and check the personal protective equipment and whether you are wearing them correctly.
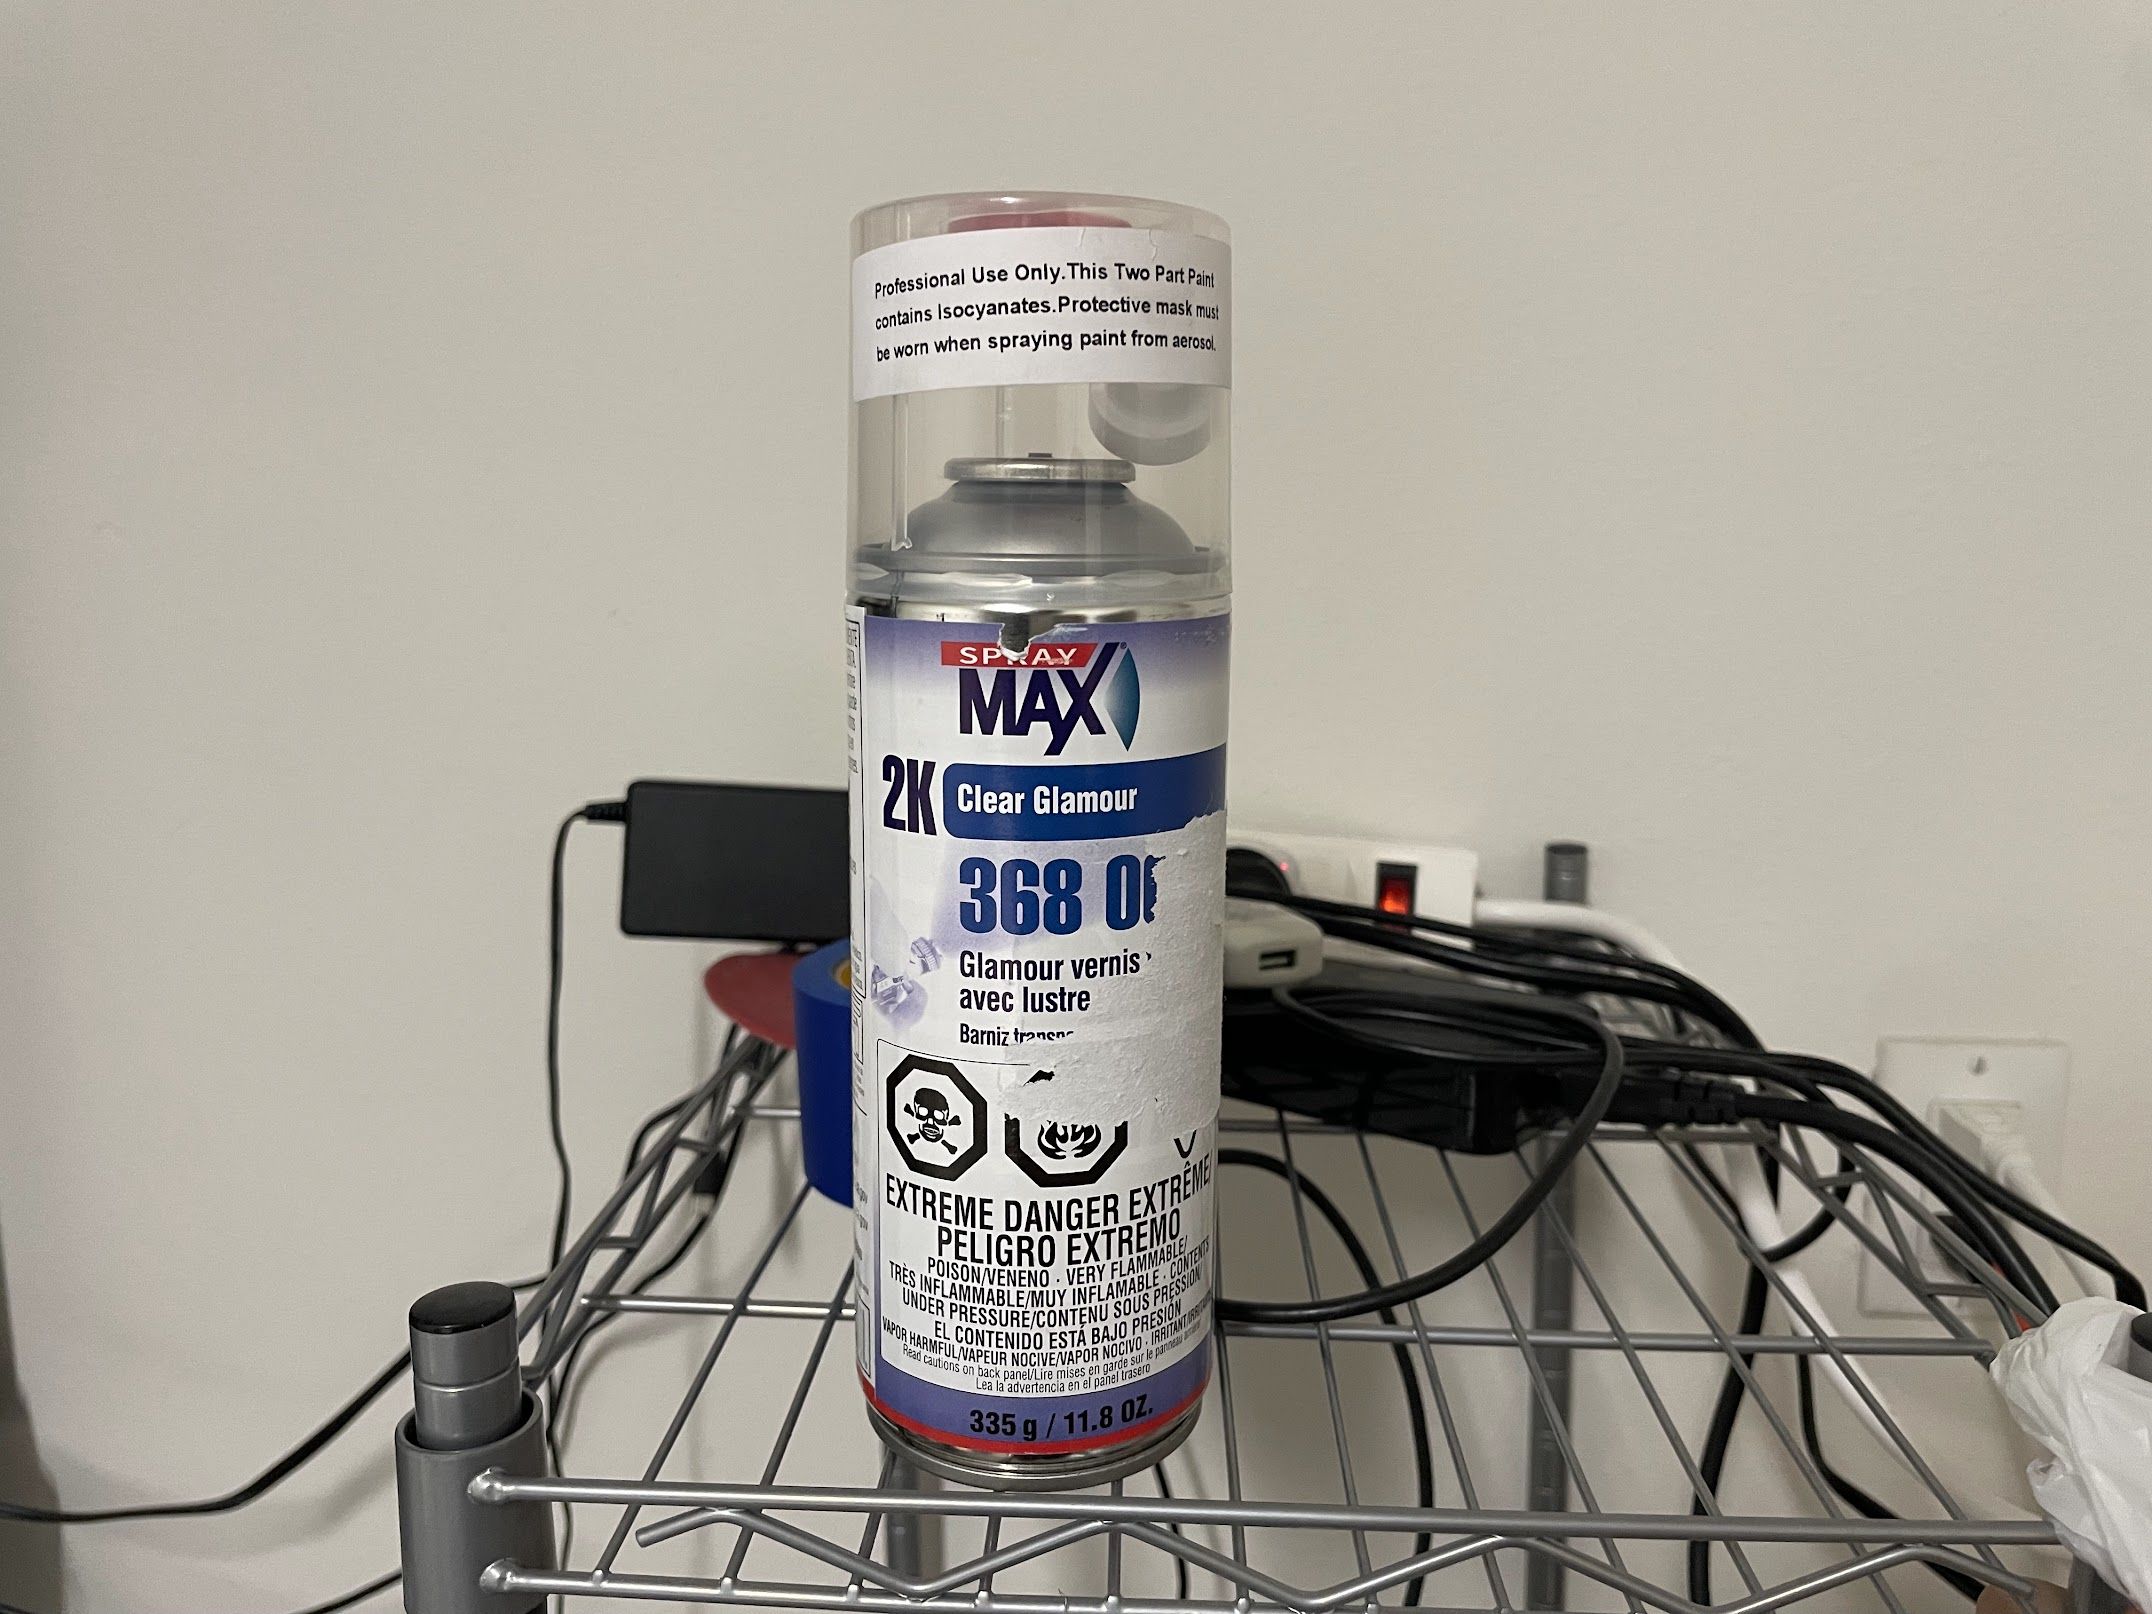
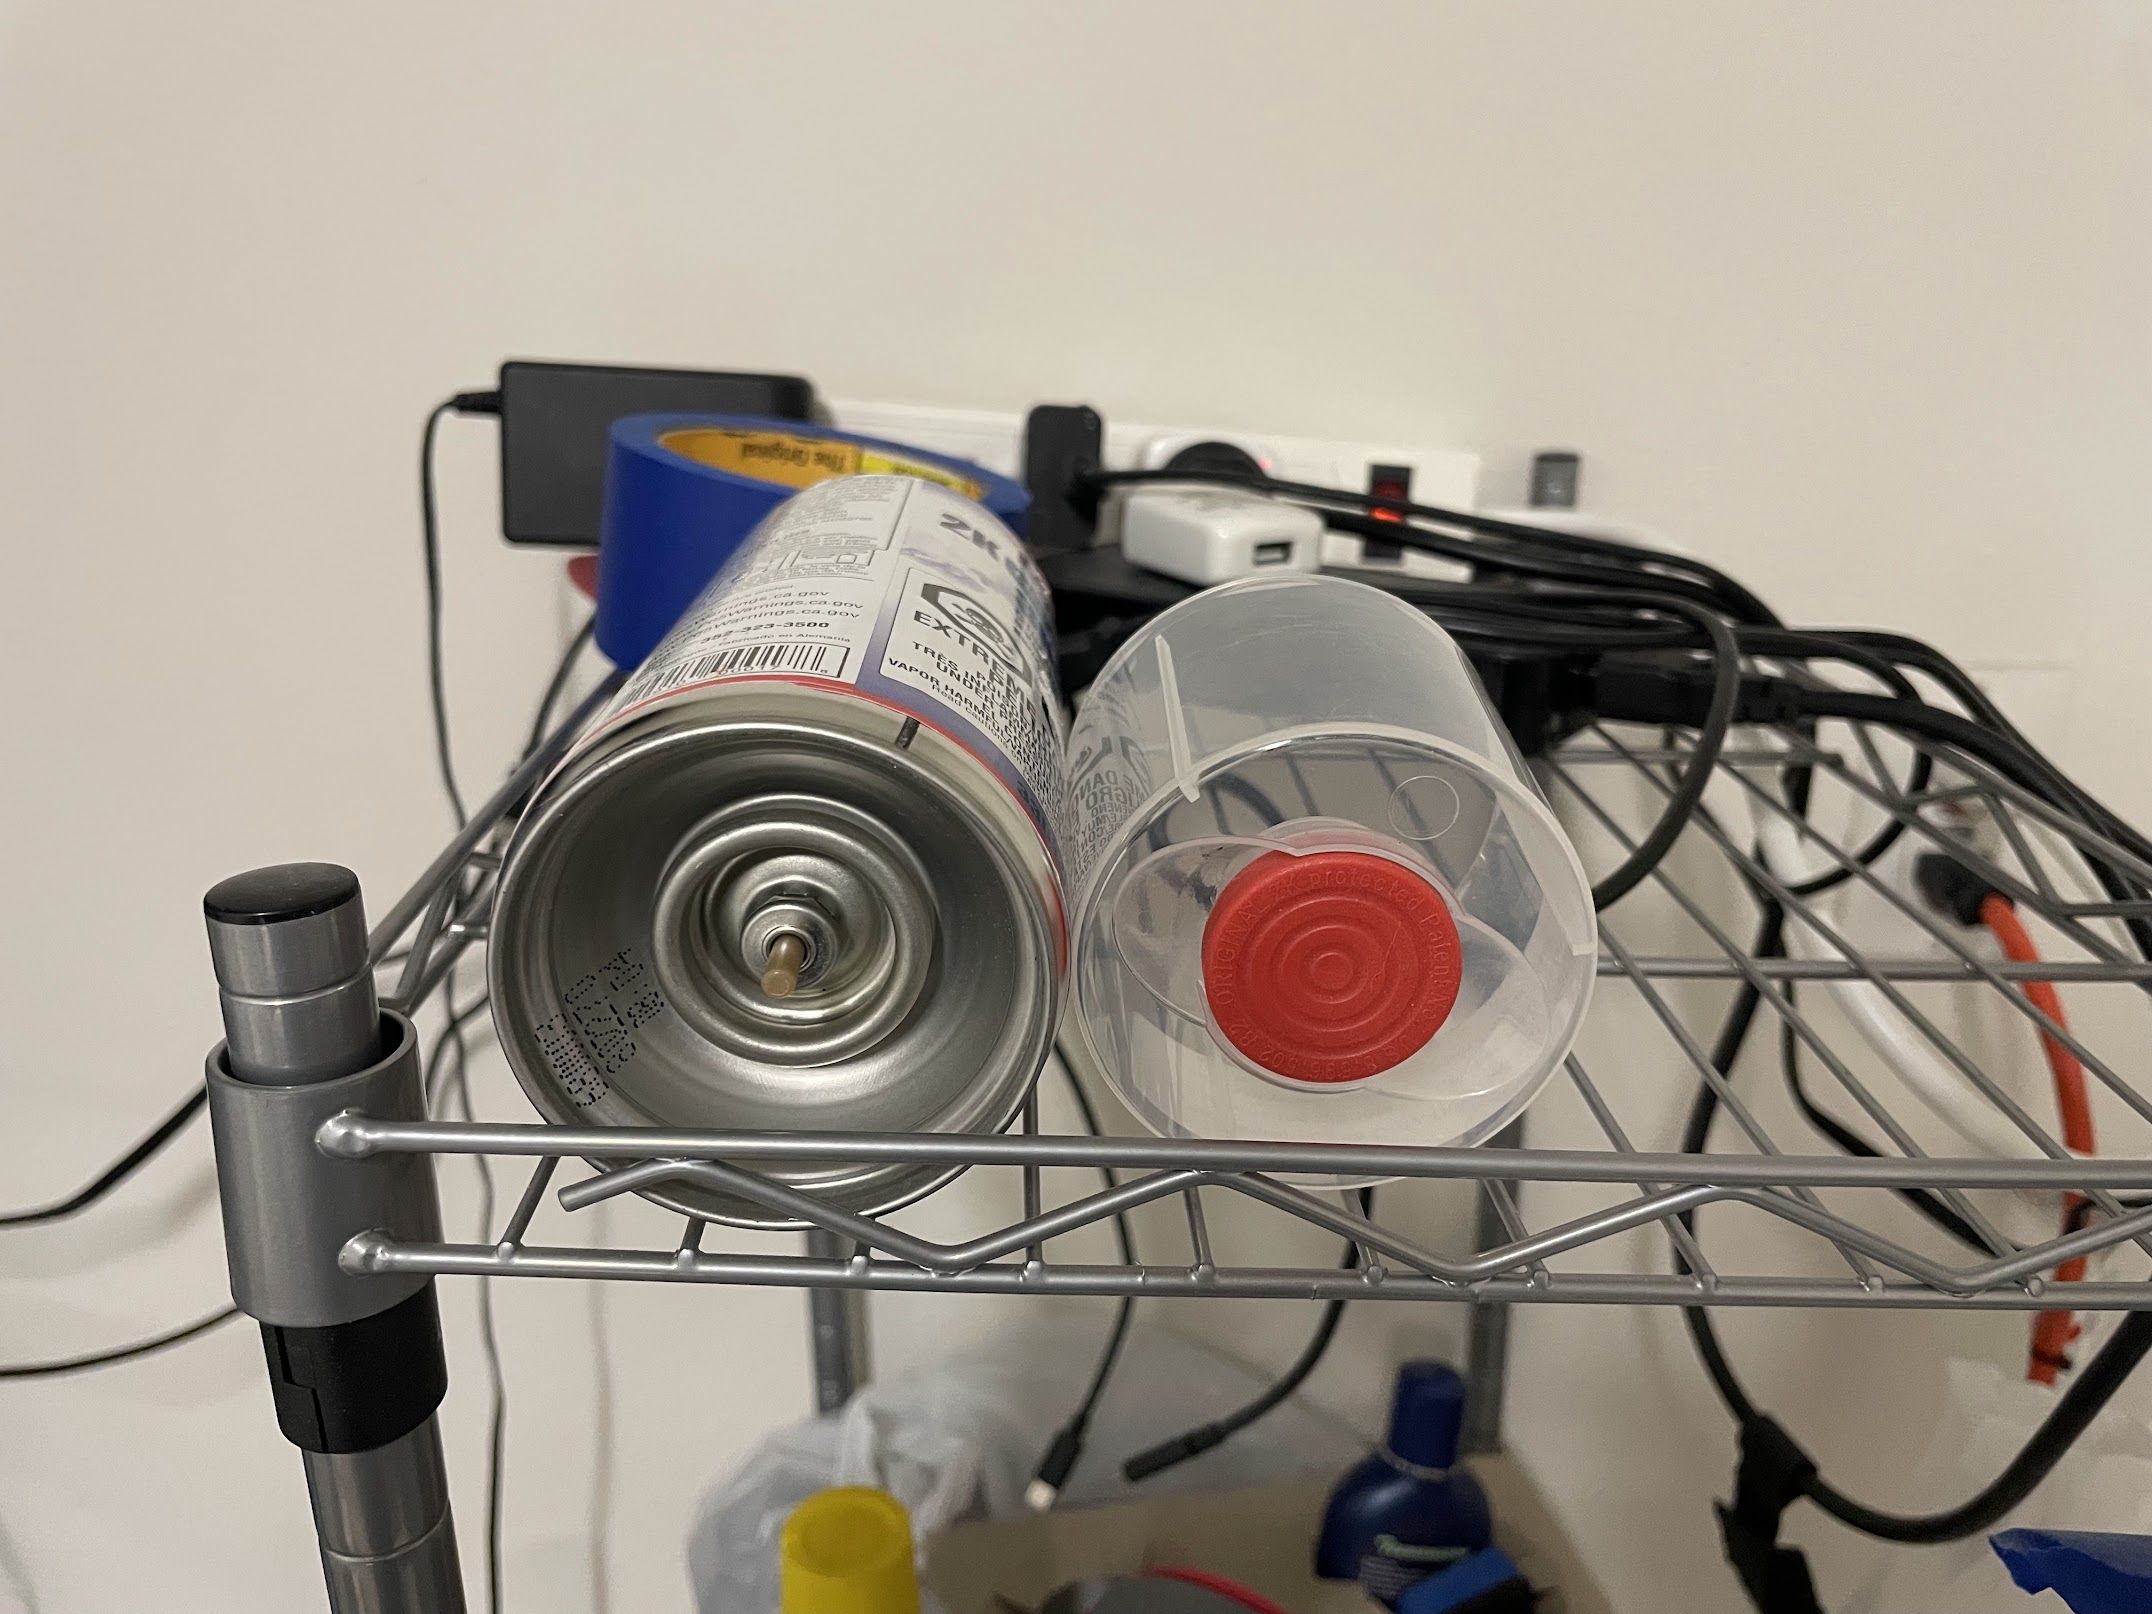
The product number of the damaged label in the picture is 368 0061.
2K clear coat is a type of polyurethane paint where the base paint and the hardener are stored in the same spray can. To use it, you must place the red button onto the bottom of the can and press it firmly to inject the hardener. Once mixed, it must be used within its 48-hour pot life. This is the same type of paint used in professional paint shops, the difference is that the shops use professional equipment to apply them. By using a 2K clear coat spray can, you can achieve a finish comparable to a professional job. If possible, I would highly recommend using 2K clearcoat for a better result.
It is important to note that there is a product on the market called 2X clear coat. This is a completely different product from 2K clear coat and the two should not be confused.
The problem with “1K Clear”
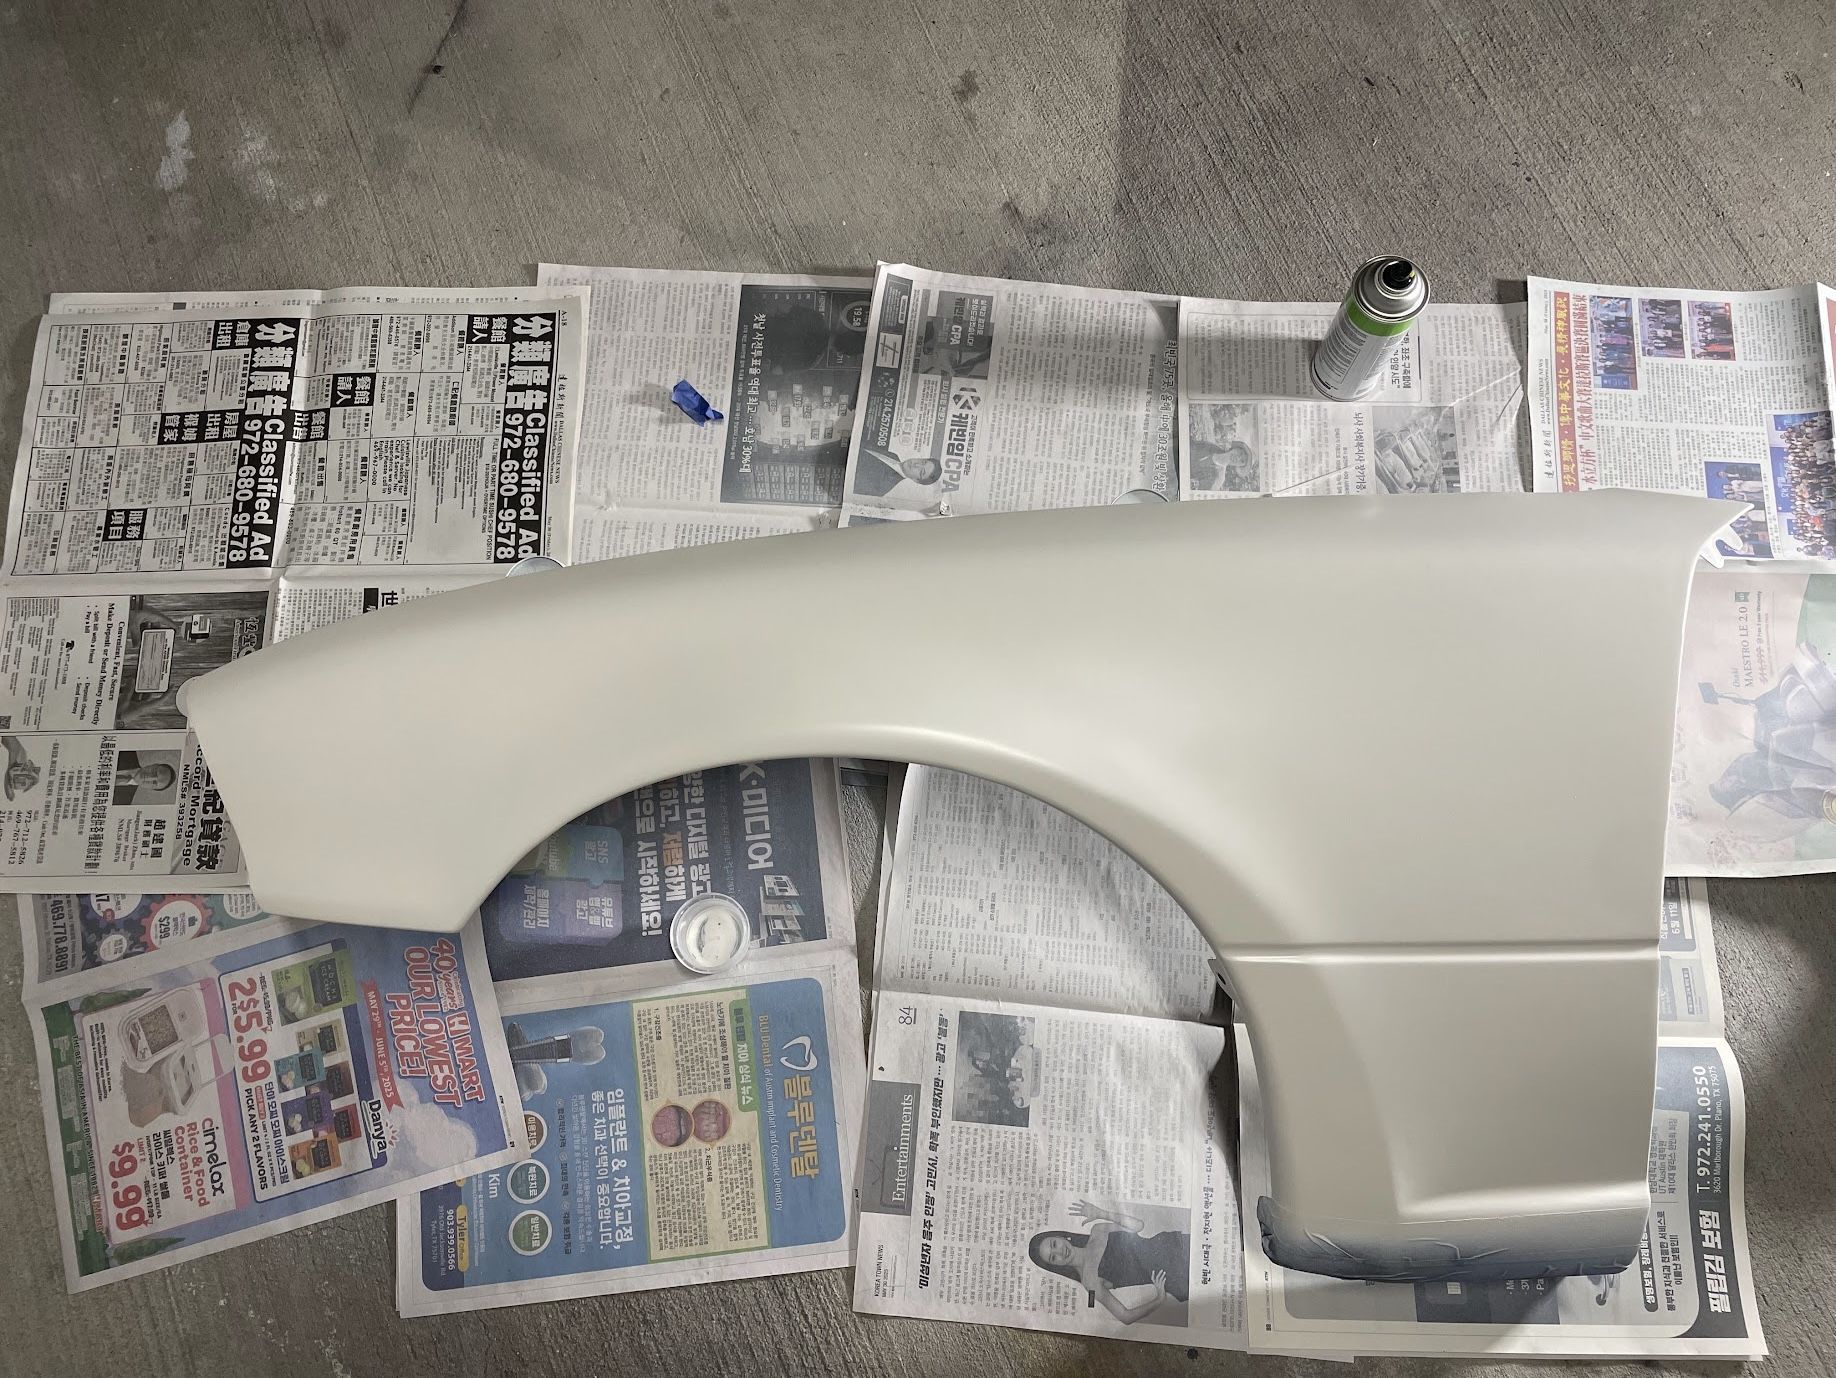
Back to the Miata’s fender. After spraying the primer and the color coat, I used the “1K Clear” product shown on the right in the image above.
After spraying, as the paint began to dry, the surface slowly started to turn yellow. Eventually, it became the color like this:
Apparently something is wrong. After some searching, I realized I’m not the only one having this problem. Here is an example:
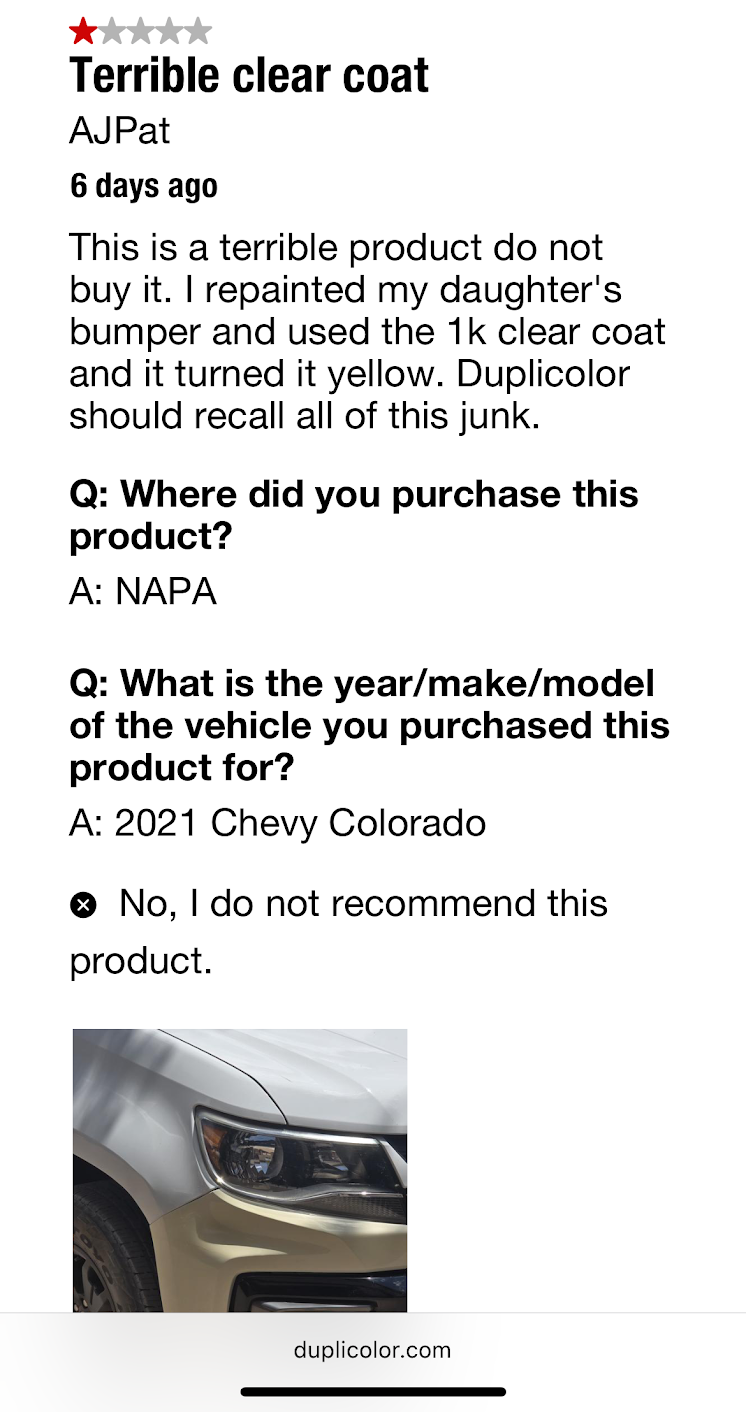
I’m a complete novice when it comes to chemistry, so I can’t fully understand the exact cause of this problem. I think there was some sort of “incompatibility” in the composition or mechanism between this clear coat and the color paint, which led to an unexpected chemical reaction. [8]
However, this problem could have been avoided—I used a product I didn’t fully understand and didn’t test it on a small area first.
To fix this, my only option is to sand it down and start over.

Application
Before getting started, please see The Best Rattle Can Car Paintjob! – YouTube[5] for a general guideline.
Sanding
First, sand the entire panel down to the factory primer or bare metal. You can use sandpaper ranging from 80 to 320 grit. Because the enamel clear coat I previously sprayed was indeed quite durable, I first sanded it with an orbital sander using 80 grit sandpaper, followed by another pass with 320 grit sandpaper. Once finished, wipe the surface with prep spray and a tack cloth to ensure all dust and grease are removed.
Priming

Because I sanded through a portion of the primer and exposed the bare metal, it was necessary to use etching primer. There are many different opinions online about how to use etching primer. The method I used was to first spray the exposed metal areas with etching primer (green), and then spray the entire surface with sandable primer (I used a mix of gray and black primer, which is why it looks a bit strange). If you need to use spot putty to fill in any small imperfections, this is also the right time to do it.
When that’s done, sand the surface with 600 grit sandpaper. Then, wipe with a tack cloth to remove the dust from sanding.
Color
There are no strict requirements for the waiting time between the primer and the color coat.
There isn’t much complexity to the color coat, simply spray 3-4 coats following to the instructions on the spray can. Water-based paints require a slightly longer flash time, so I waited 15 minutes between each coat.
Clear Coat
Generally, it is recommended to wait at least 30 minutes but no more than 24 hours between applying the color coat and the clear coat[9]. If you wait longer than 24 hours, it is recommended to sand the surface with 500-1000 grit sandpaper before spraying the clear coat to avoid adhesion problems.
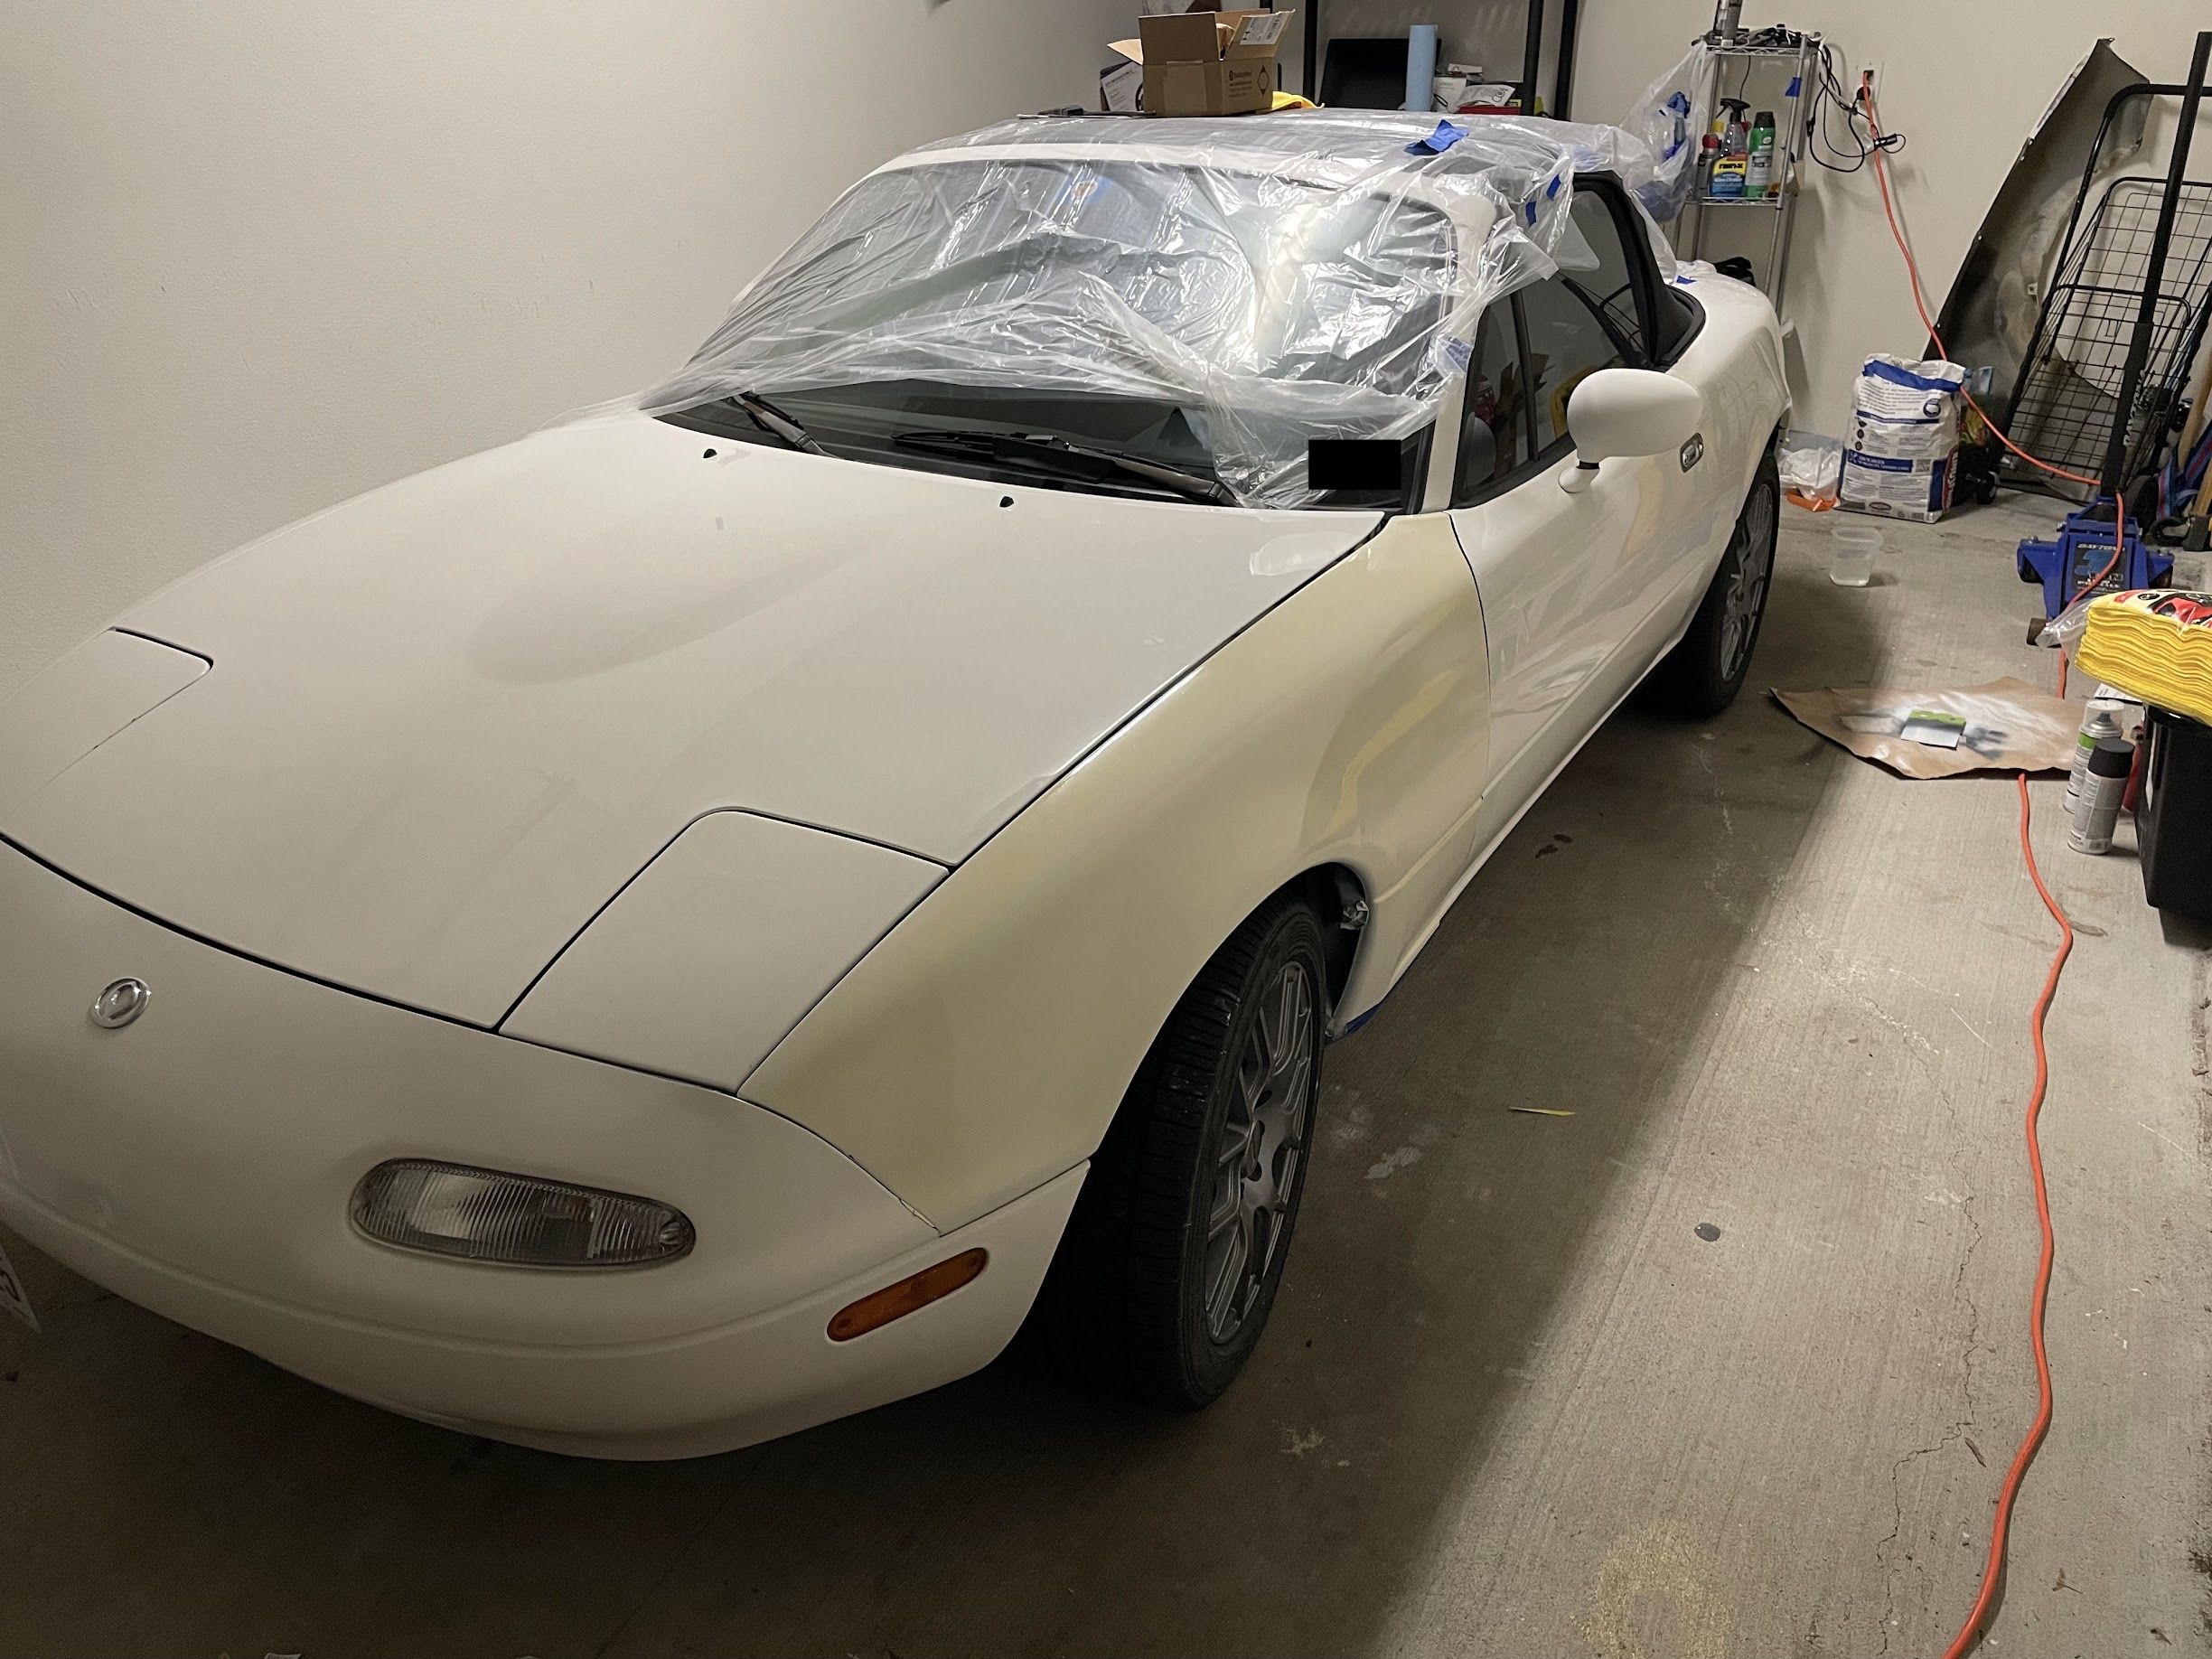
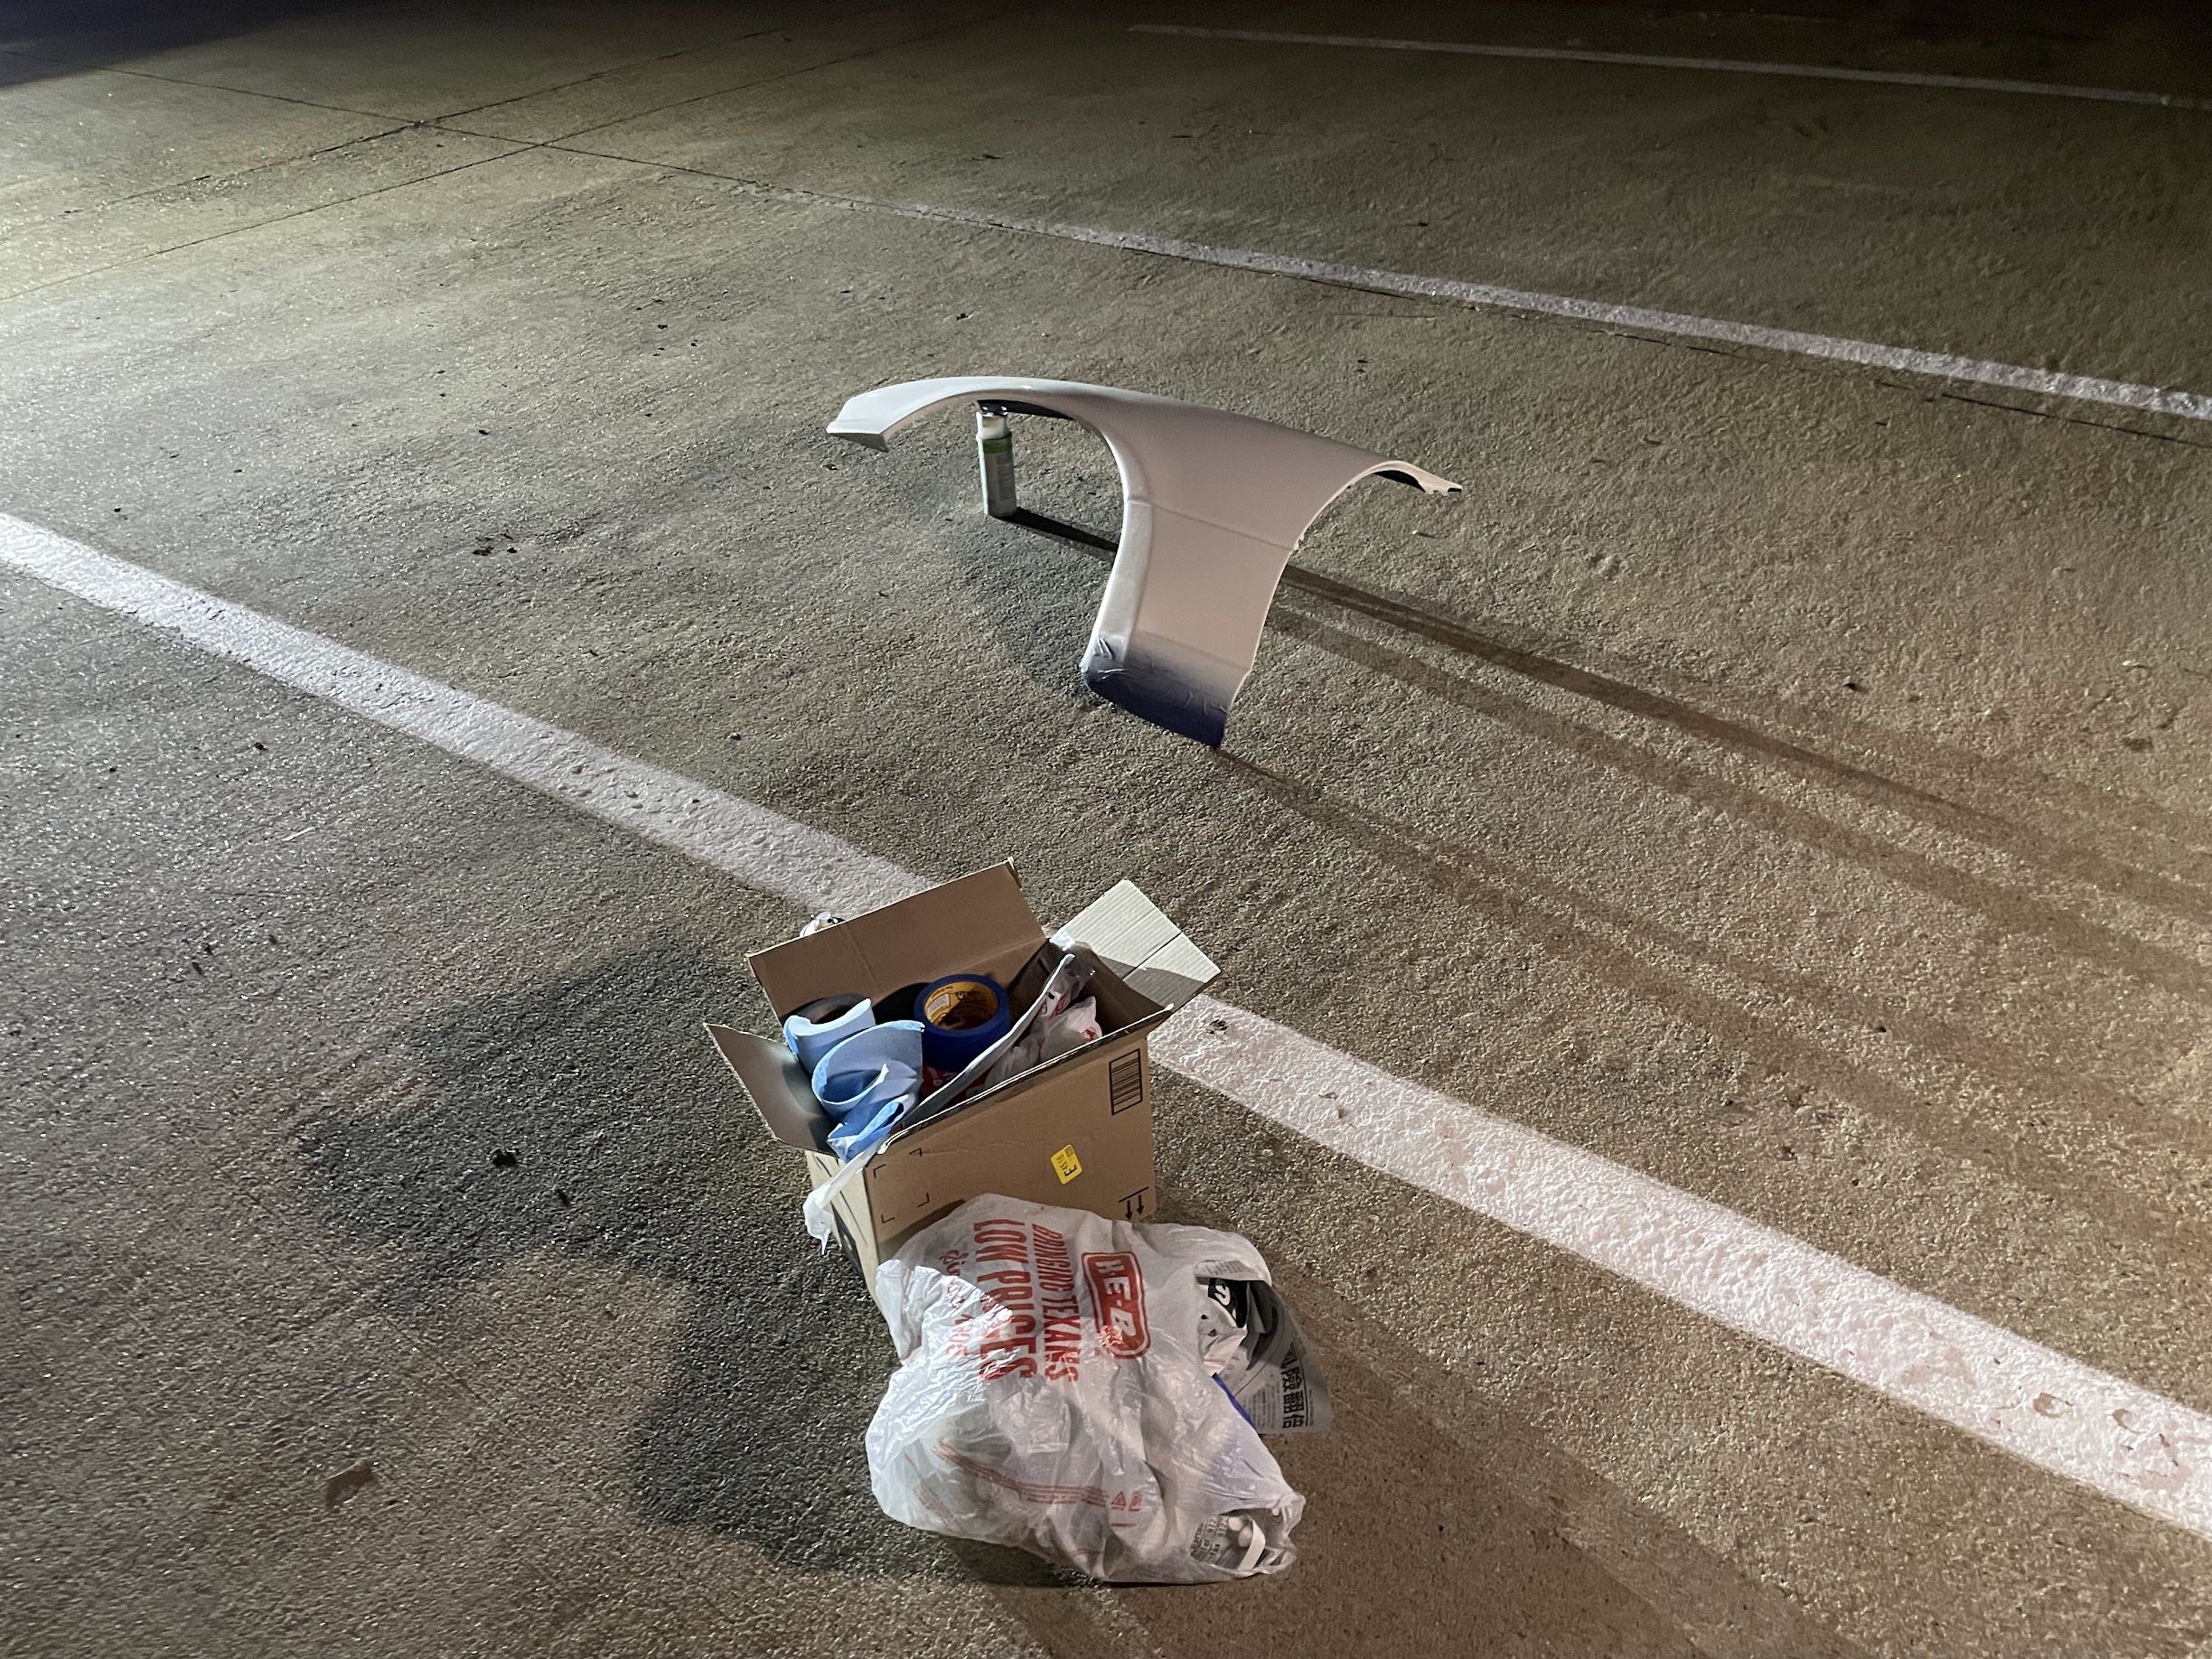
I used SprayMax 2K clear coat. Since my garage is attached garage, I went to an empty parking lot in the community at night to do the spraying, to avoid exposing my family and neighbors to the toxic substances.
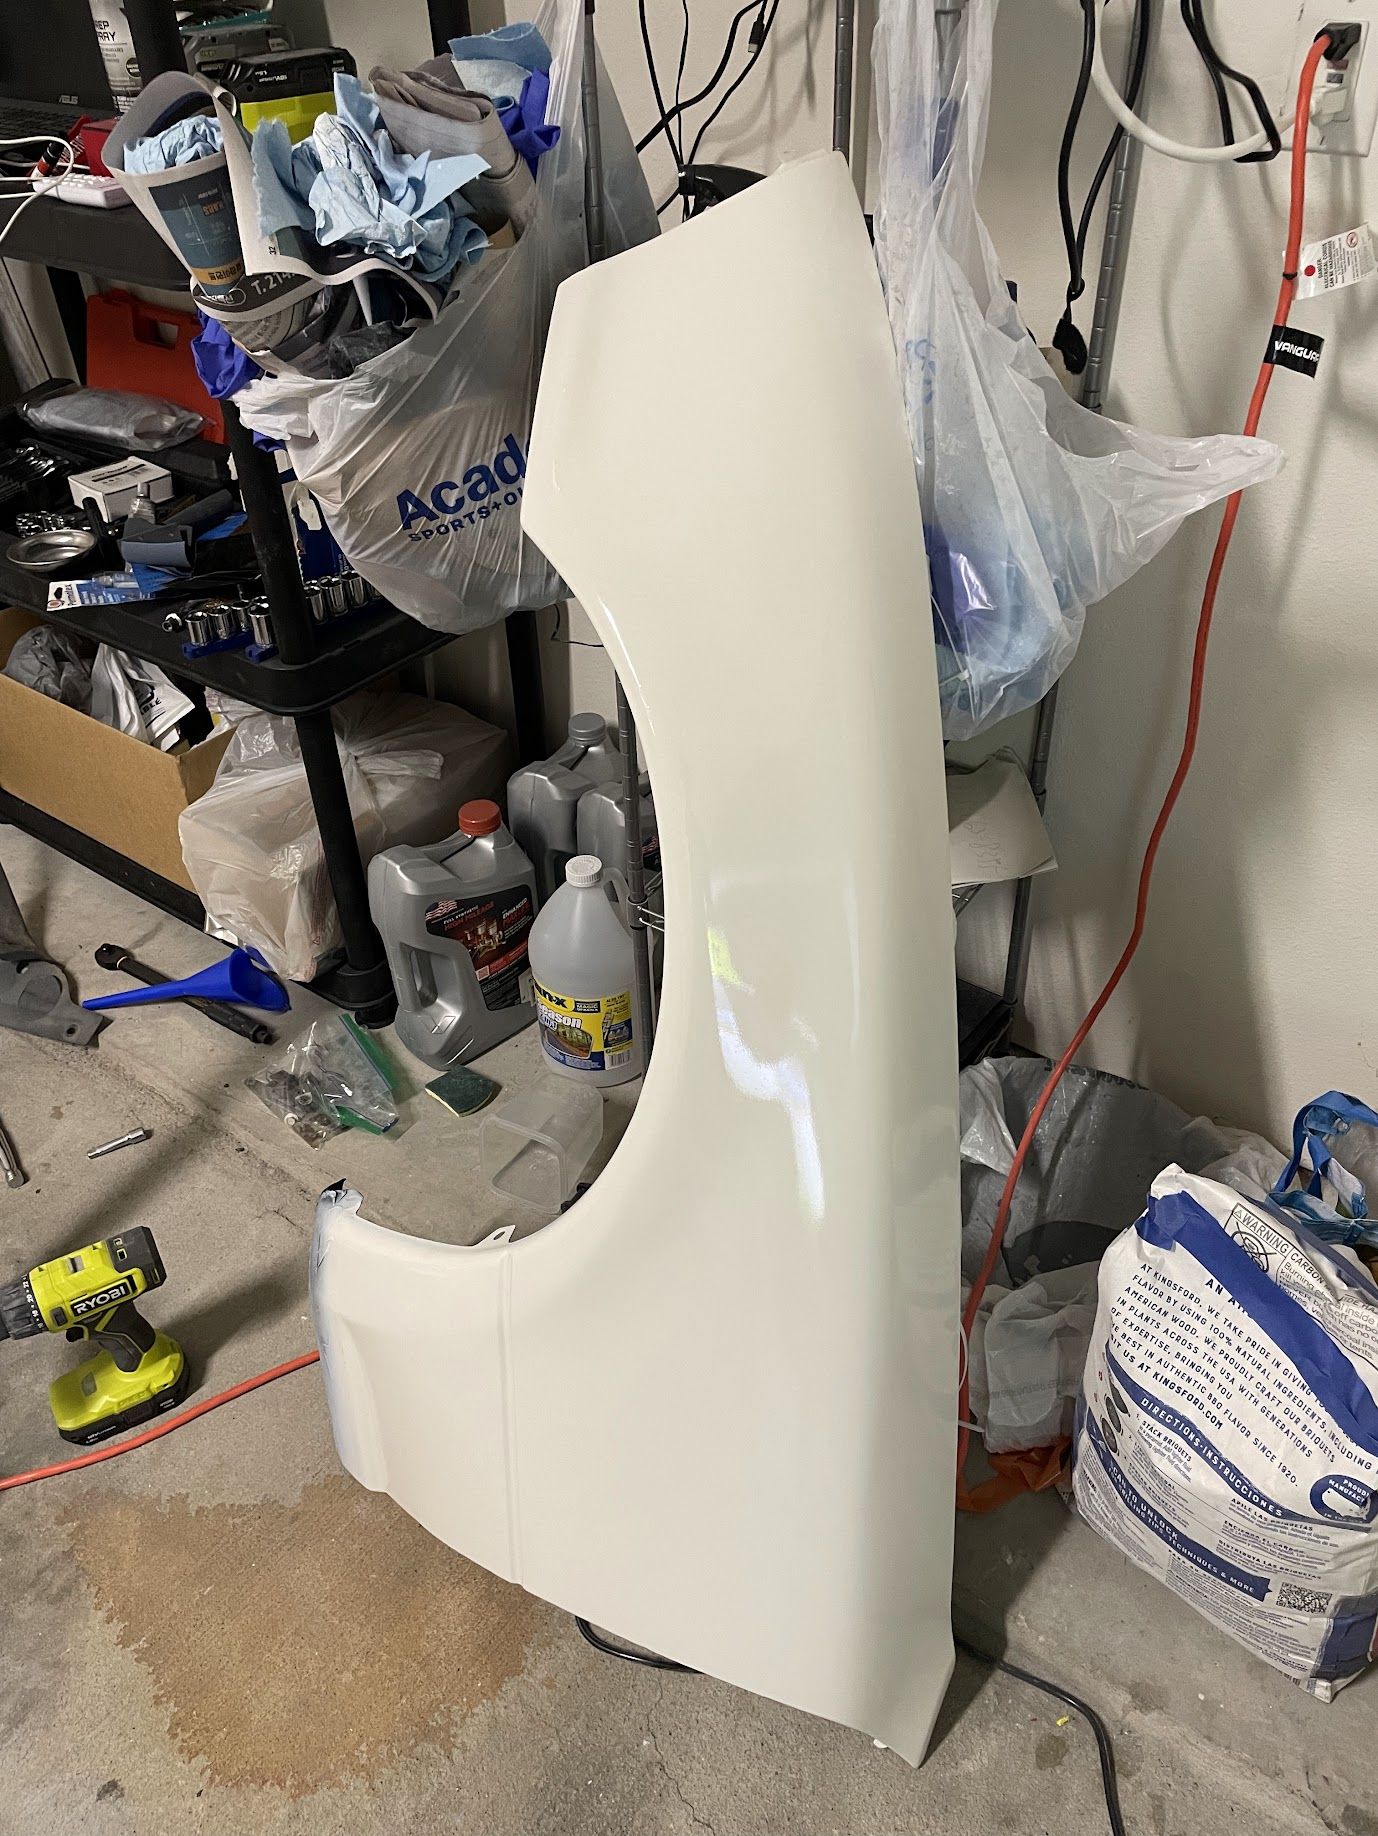
The dry-to-touch time of SprayMax 2K clear is 20-30 minutes. If the part was painted off the car, it would be better to wait 48-72 before installing, to allow sufficient time for the paint to cure.
Out with the old, in with the new.
Wet Sanding and Polishing
As you can see in the photo, the orange peel is quite noticeable. I wet sanded the finish with 1000->1500->2000->3000->5000 grit sandpaper and soapy water. Then buff with cutting compound and polishing compound.
Common Problems
Orange Peel
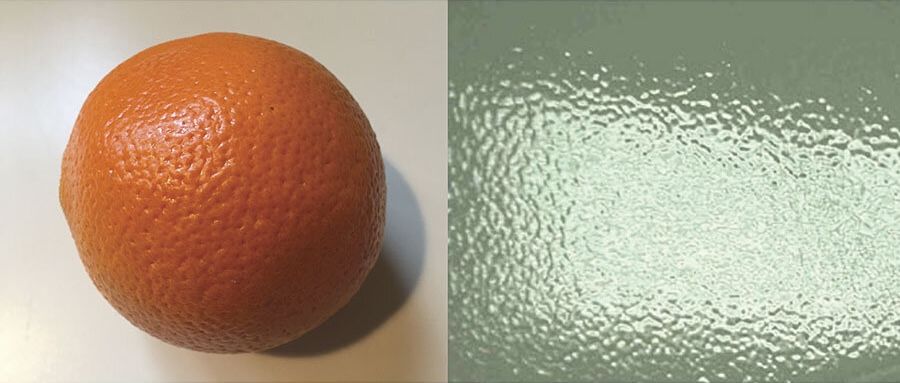
Orange peel is a common paint defect that makes the finish look bumpy and uneven, similar to the skin of an orange, lacking a smooth, mirror-like effect.
Orange peel is formed when the paint does not flow and level out sufficiently while it is still wet. The paint droplets do not fully merge and spread across the surface, instead retaining some of their original droplet shape, which creates this uneven texture after drying. In fact, if you look closely at the original factory paint on a modern car, you will also find slight orange peel.
For professional paint shops, a properly applied paint job does not require sanding and polishing, otherwise, labor costs and turnaround time would double. By correctly setting up the equipment, orange peel can be reduced to a level that is not bothersome, though it cannot be completely eliminated. However, severe orange peel is usually due to an issue mixing the paint, or improper equipment setup.
But when using spray cans, orange peel is a difficult problem to avoid due to the can’s limited flow and pressure. Generally, the orange peel from a 2K clear coat is significantly better than a 1K clear coat, but the result may still not be satisfactory.
One method to mitigate this is to warm up the spray can in the hottest water from your kitchen sink before you start painting, and shake the can for more than two minutes. Also, do not apply each coat too thickly. These methods can help reduce the orange peel to some extent. If the final result is still not what you expected, you can sand and polish it by following the steps described earlier.
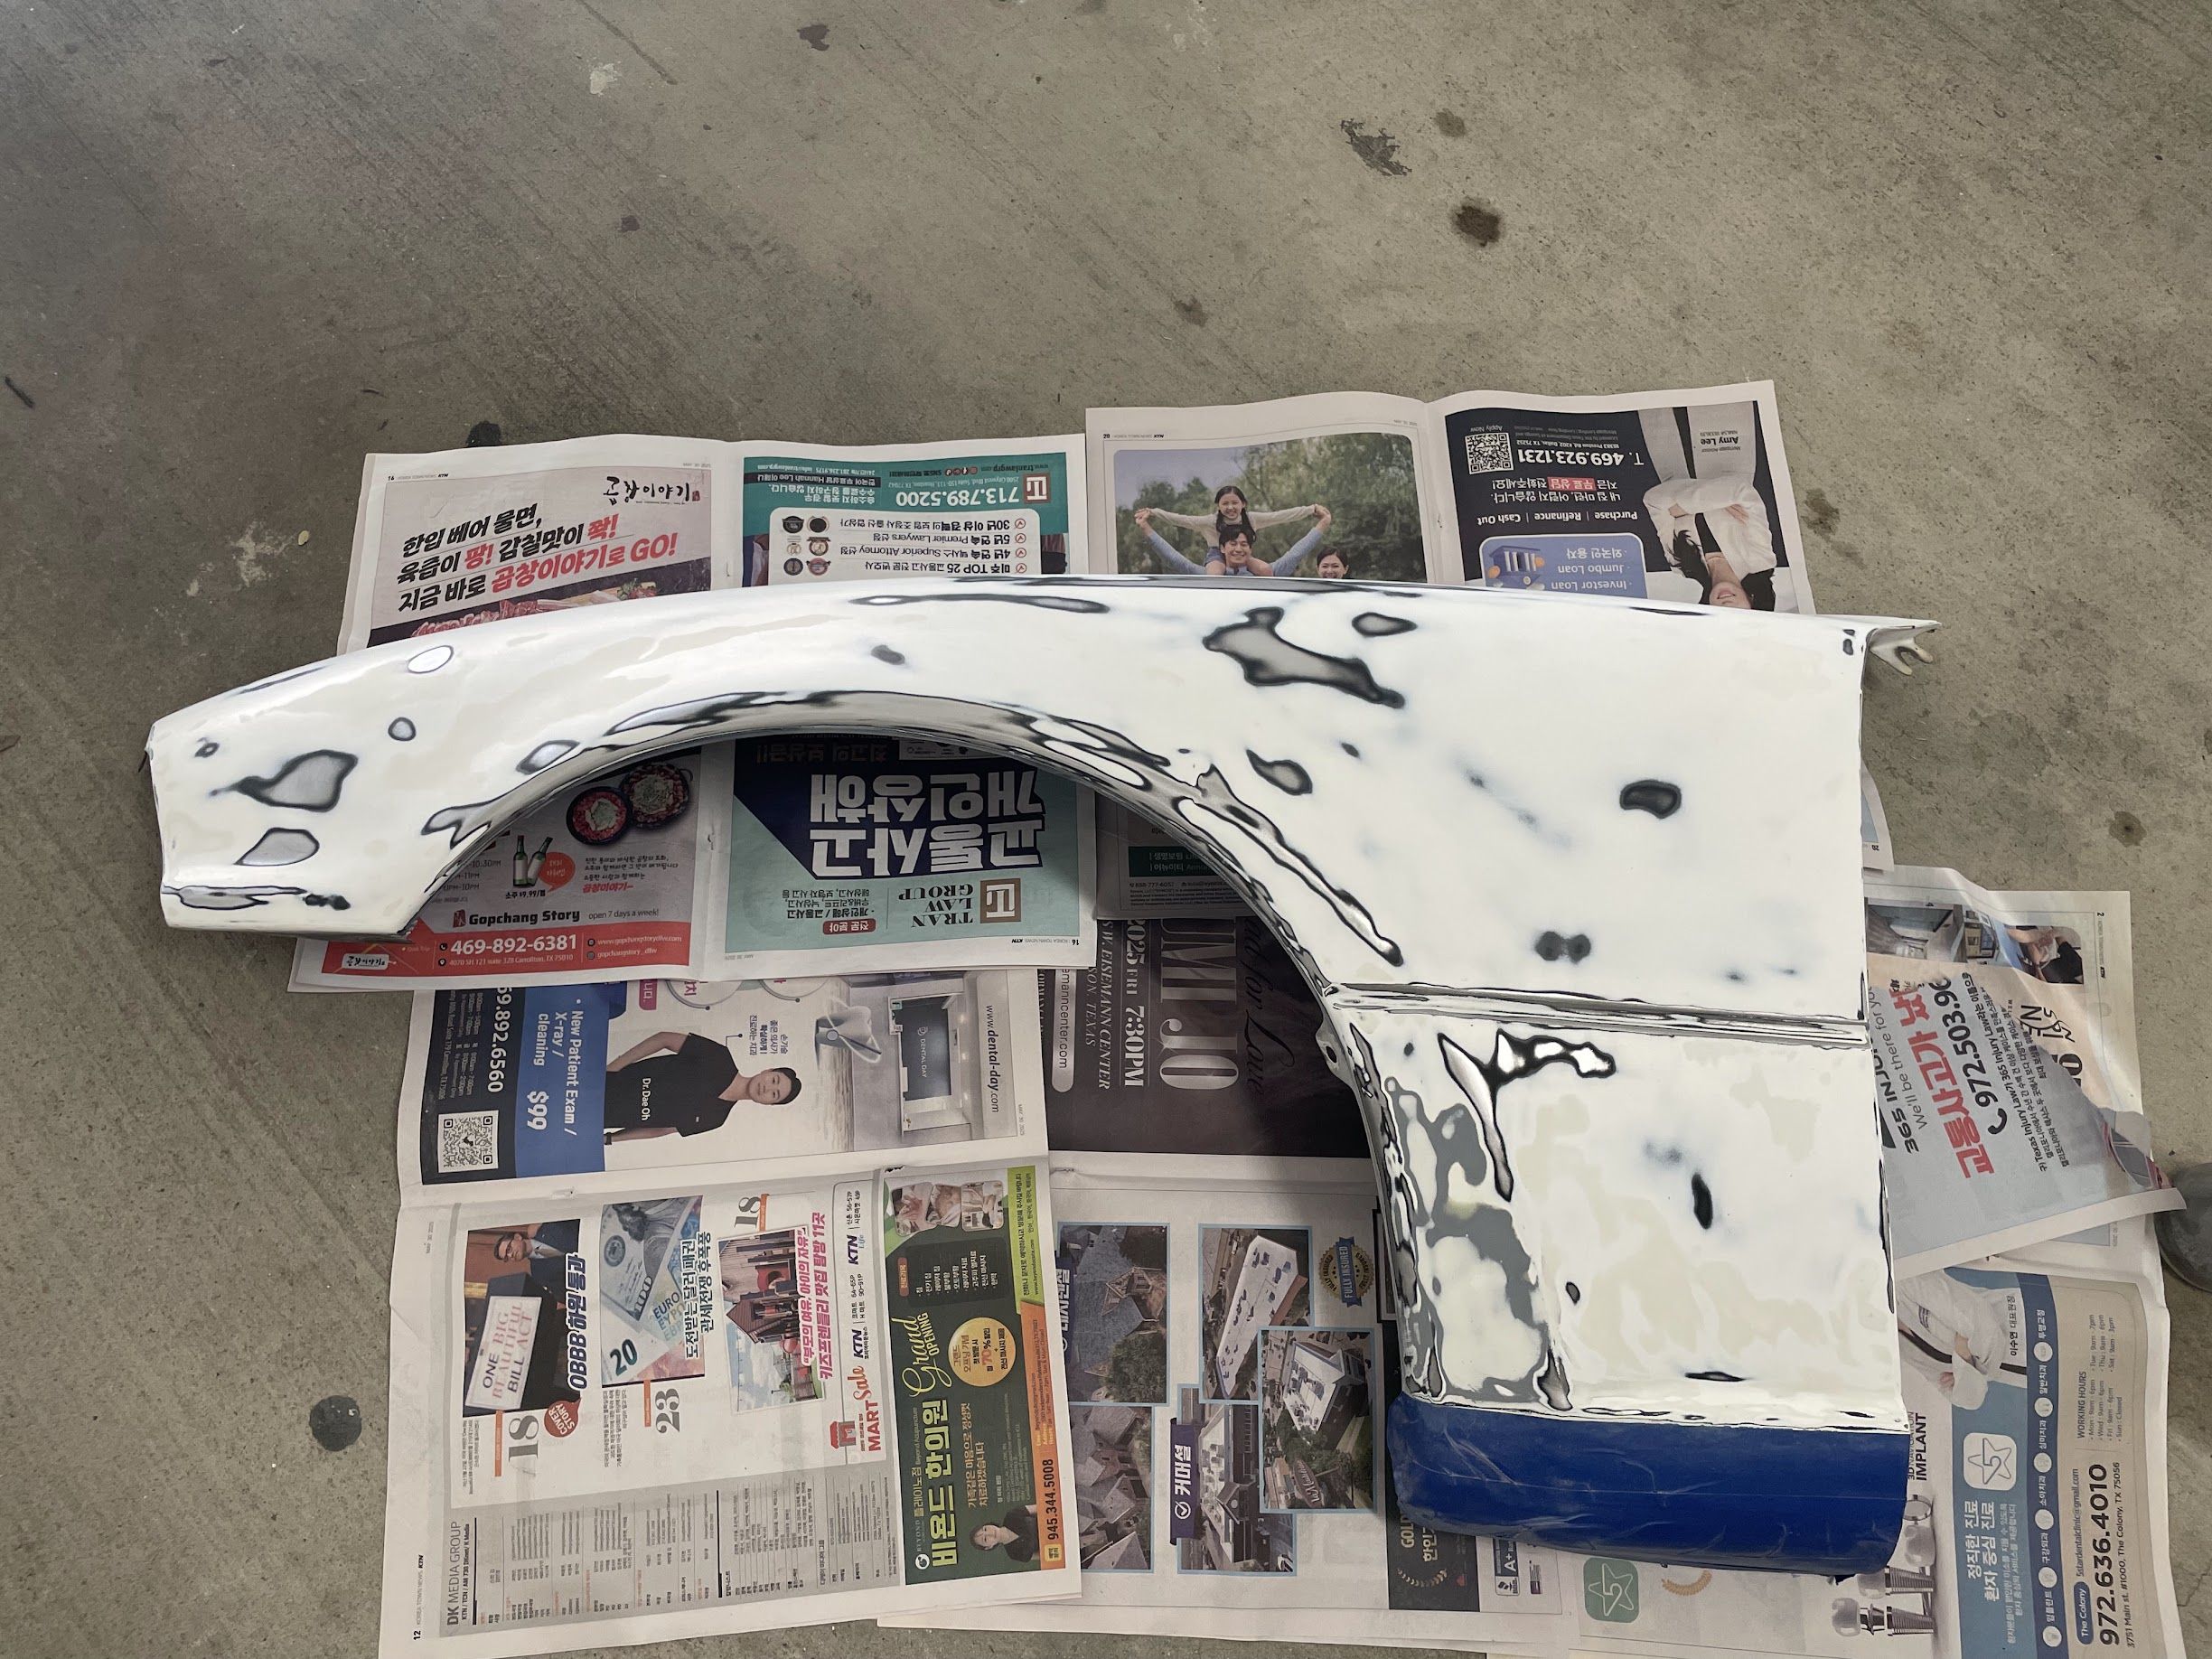
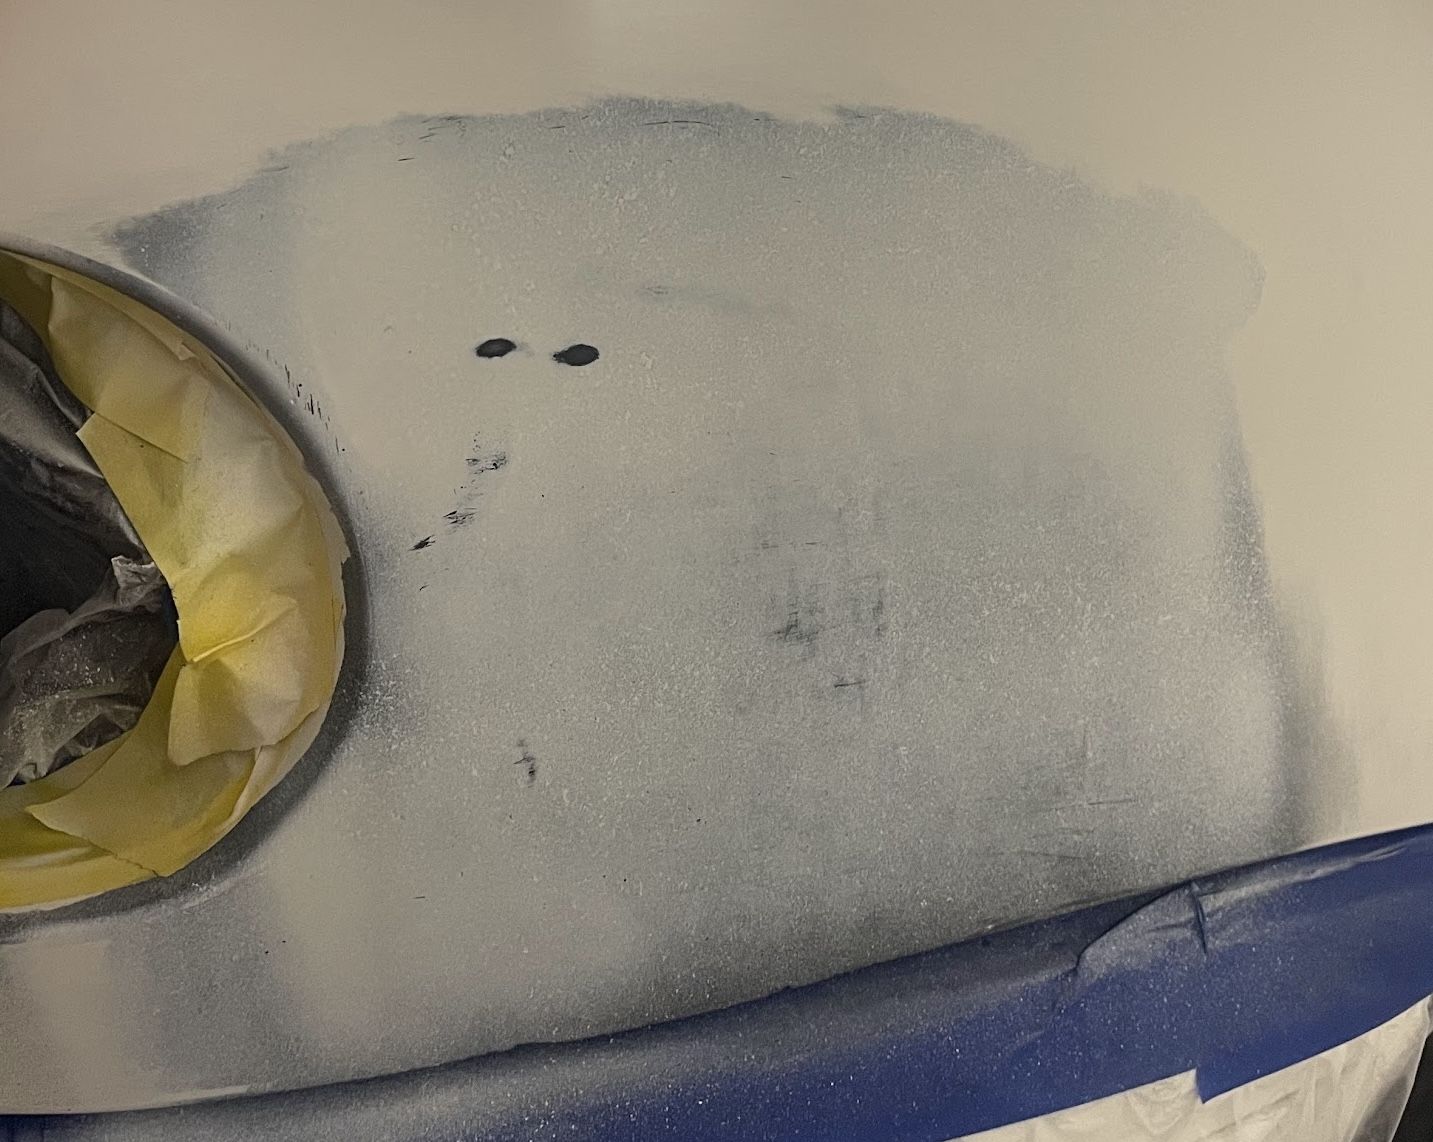
“Spurting” / “Spitting”
“Spurting” or “spitting” refers to when a spray can ejects large droplets or solid chunks mixed in with the paint, rather than a fine, even mist, as shown in the picture below.
The main cause of this problem is usually a quality issue with the spray can itself. The simplest and most effective solution is to get a new can. However, if the color you need is relatively uncommon and not readily available at a local store, replacing the can can be impratical. For example, I ordered my paint from touchupdirect.com, and it took 1-2 weeks to arrive.
We can tackle this problem on two levels:
First, try the following methods to get the spray can to work:
- Warm the spray can in hot water using the hottest water from your kitchen sink. [11][12]
- Shake the can for at least 2 minutes before you start spraying.
- Clean the nozzle according to the instructions on the can’s label. For example, the instructions on my can said to turn it upside down and spray for 3-5 seconds.
These methods can help alleviate the problem to some extent, but they may not eliminate it entirely. This is especially true if you only notice the issue after you’ve already sprayed a coat. So, how can you fix a paint job that has already been affected?
The method I used is as follows:
- If it’s the primer, no special treatment is needed. Just sand it after it dries.
- If it’s the color coat, apply 3-4 coats as you normally would. Wait at least 24 hours for the color coat to cure. Then, wet sand with 1000 grit sandpaper and soapy water until it feels smooth to the touch. You can then proceed with spraying the clear coat.
- If it’s the clear coat, no special treatment is needed. Sand and polish it as you normally would after it dries.
If you use “waterborne” paint, the name might literally make you think it dissolves in water. Actually, waterborne paint uses water as the main solvent before it dries. However, once it has dried and cured, it becomes insoluble in water, so you can safely wet sand it with soapy water.
Blending
Generally, to achieve the best result, you should repaint the entire panel, no matter how small the area needing repair is. This is because if you only repaint a small area, there will always be a difference in gloss and color between the new and old paint. It’s very difficult to get a perfect match, especially for non-professionals using non-professional equipment.
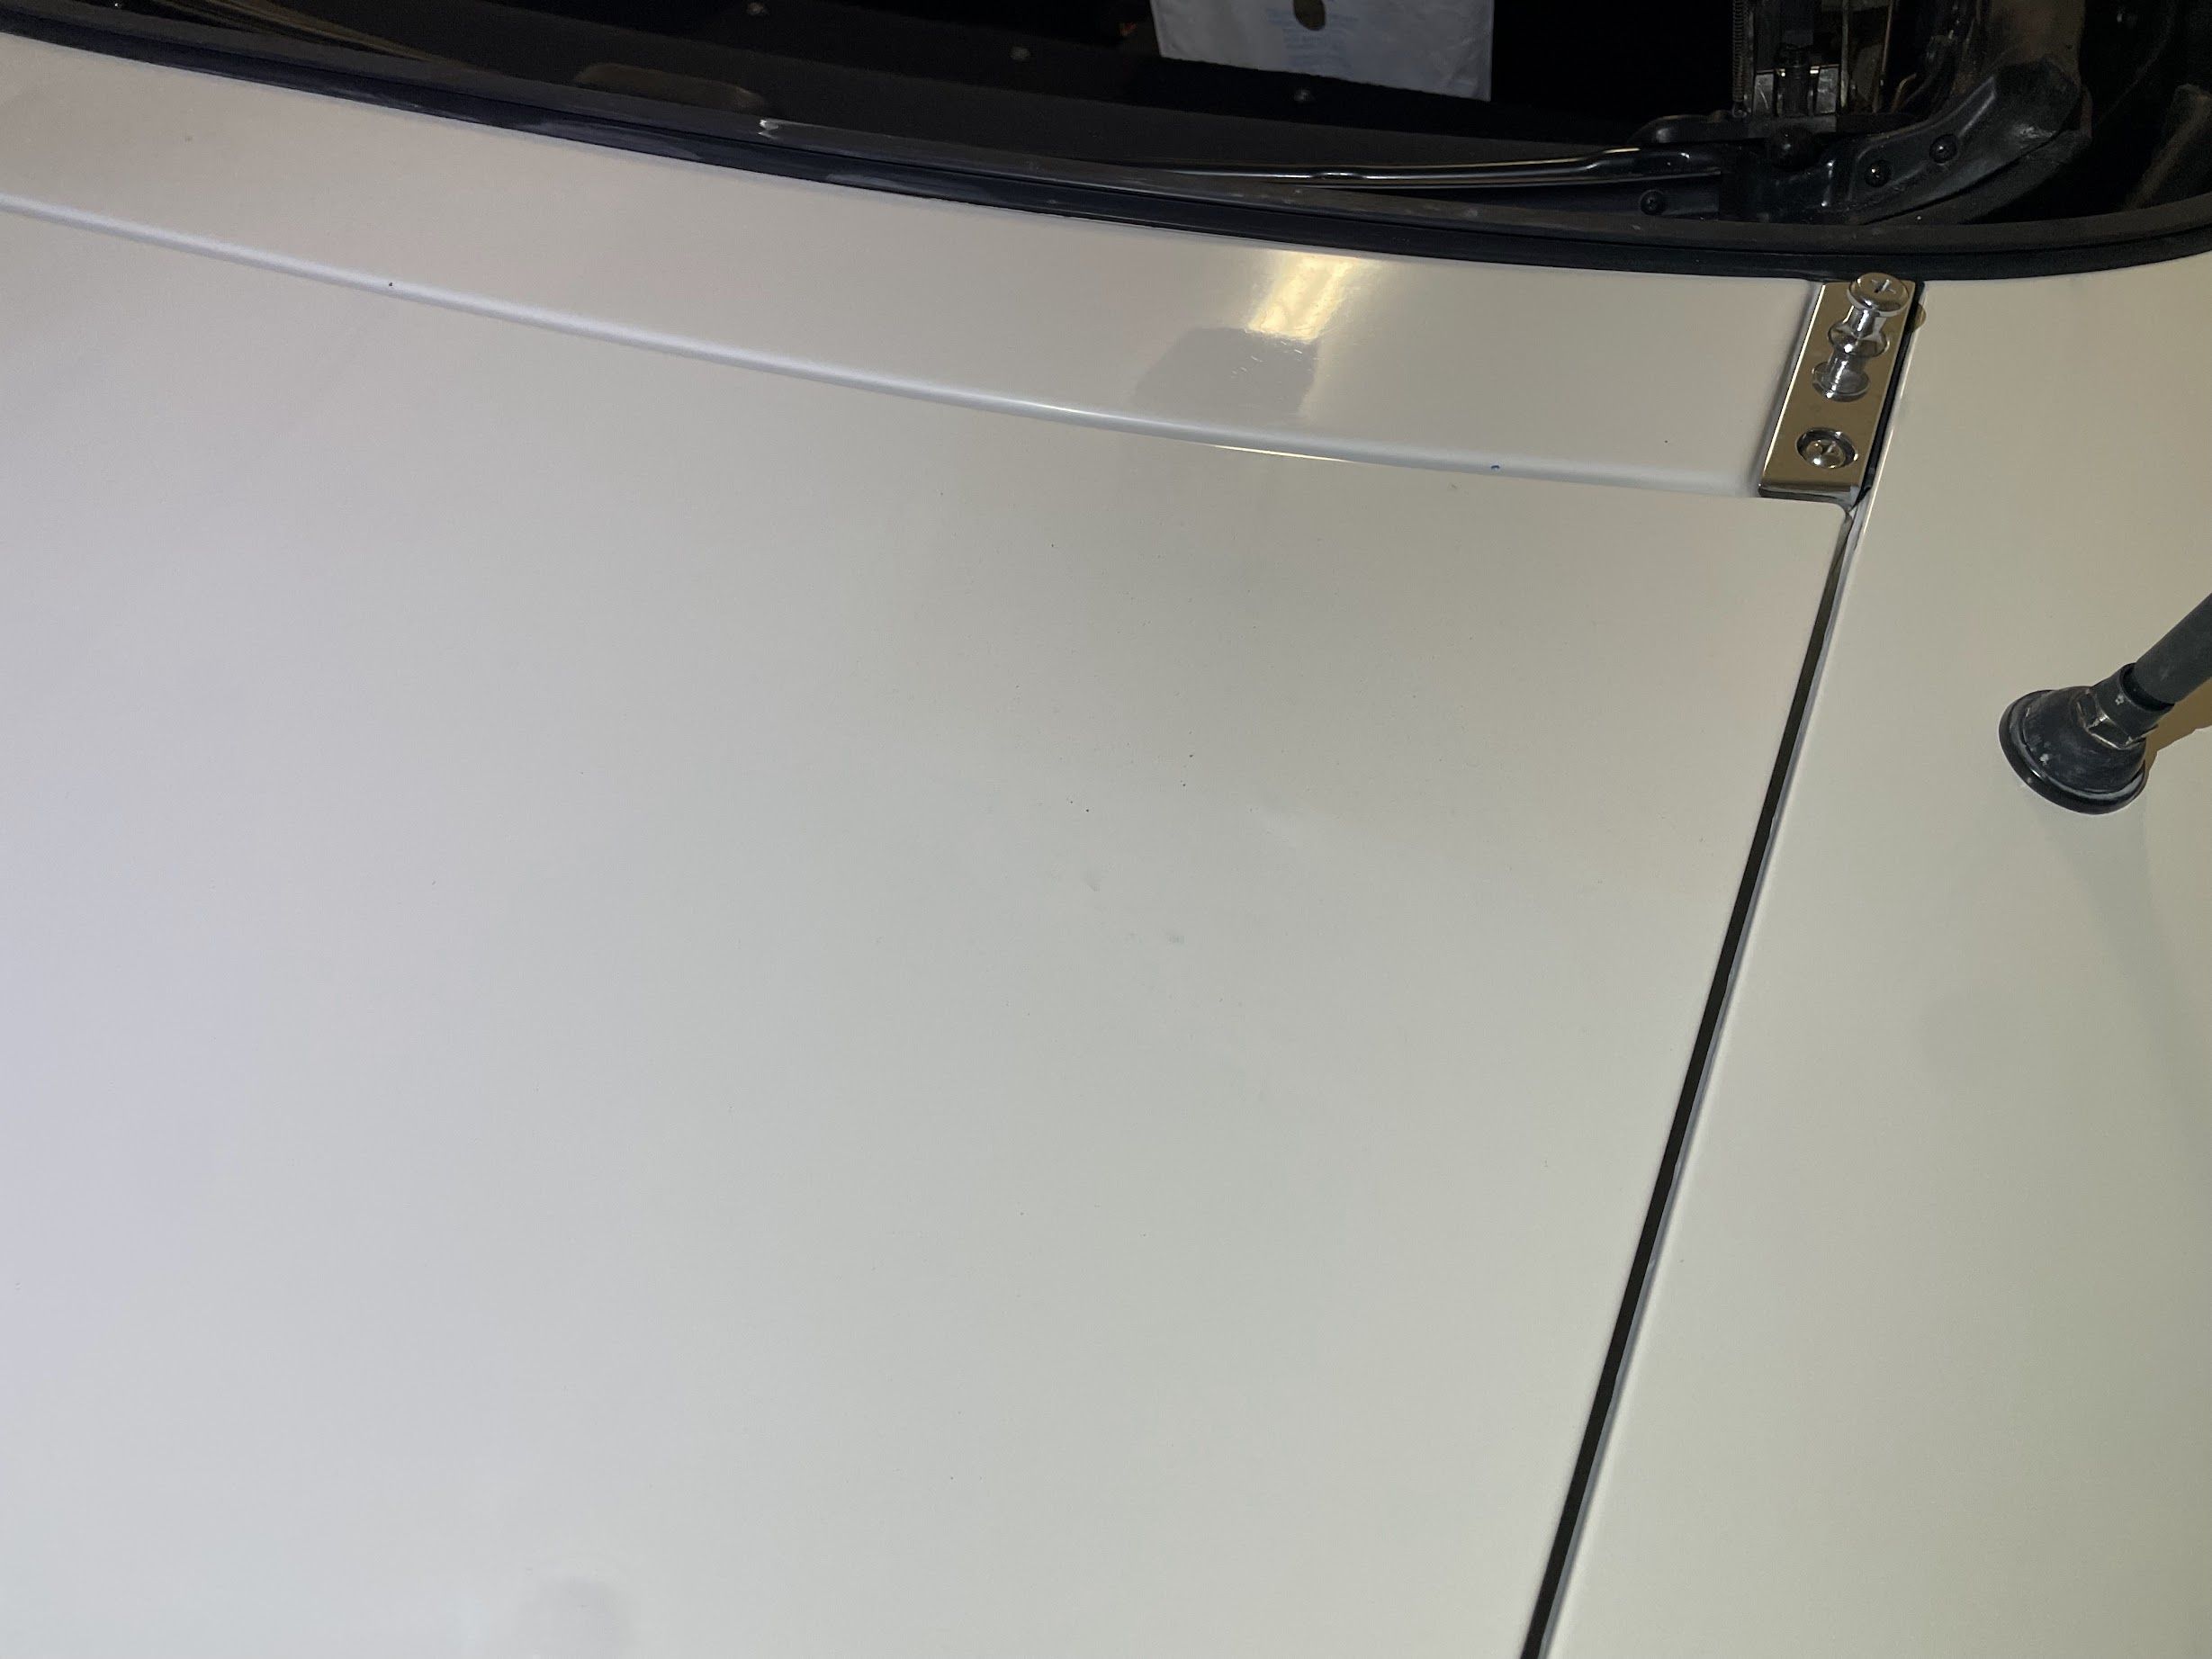
Below is an example of a spot repair blend that I think was done quite well, yet the result is still not entirely satisfactory.
If you must do a spot repair, these following steps can help you achieve better blending[11]:
Sand the area surrounding the repair with 1000 grit sandpaper. The sanded area needs to be much larger than the actual area being repaired to ensure there is enough space to blend the paint and that the color and clear coats can adhere properly.
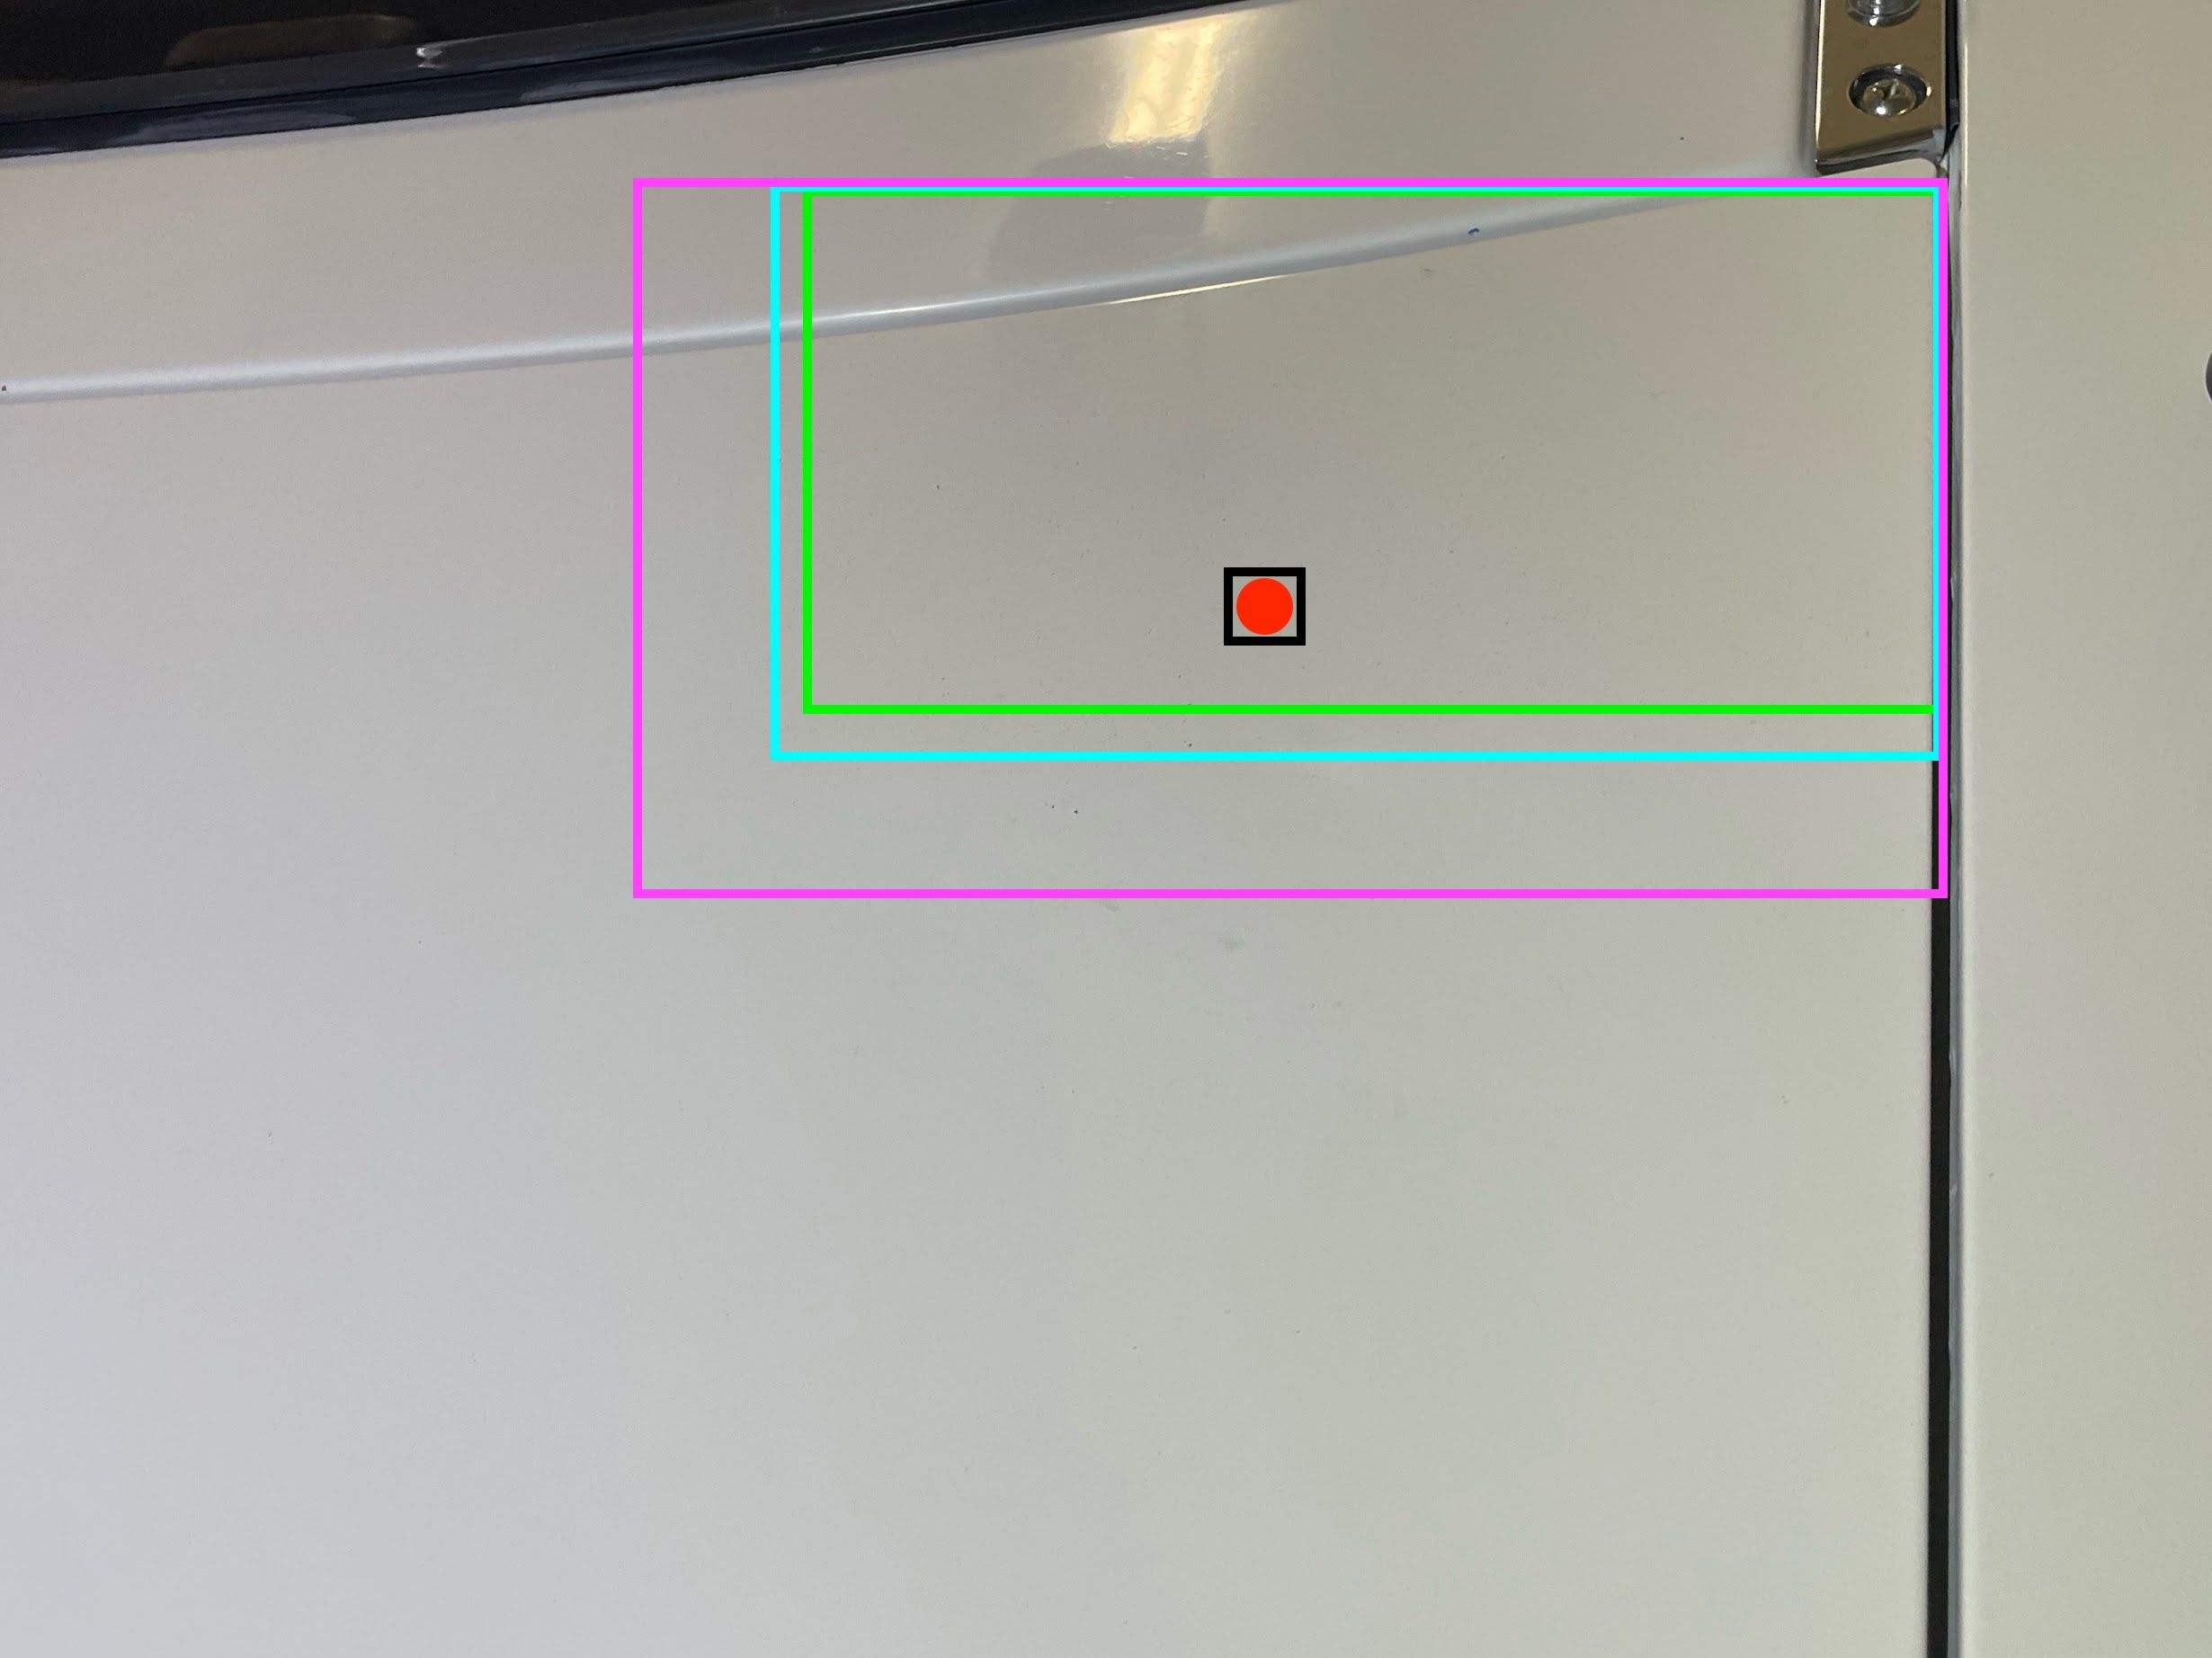
For example, in the image below, if the red dot is the damaged area, then the areas to be worked on are:
- Black box: Primer
- Green box: Color Coat
- Blue box: Clear Coat
- Purple box: Sanding
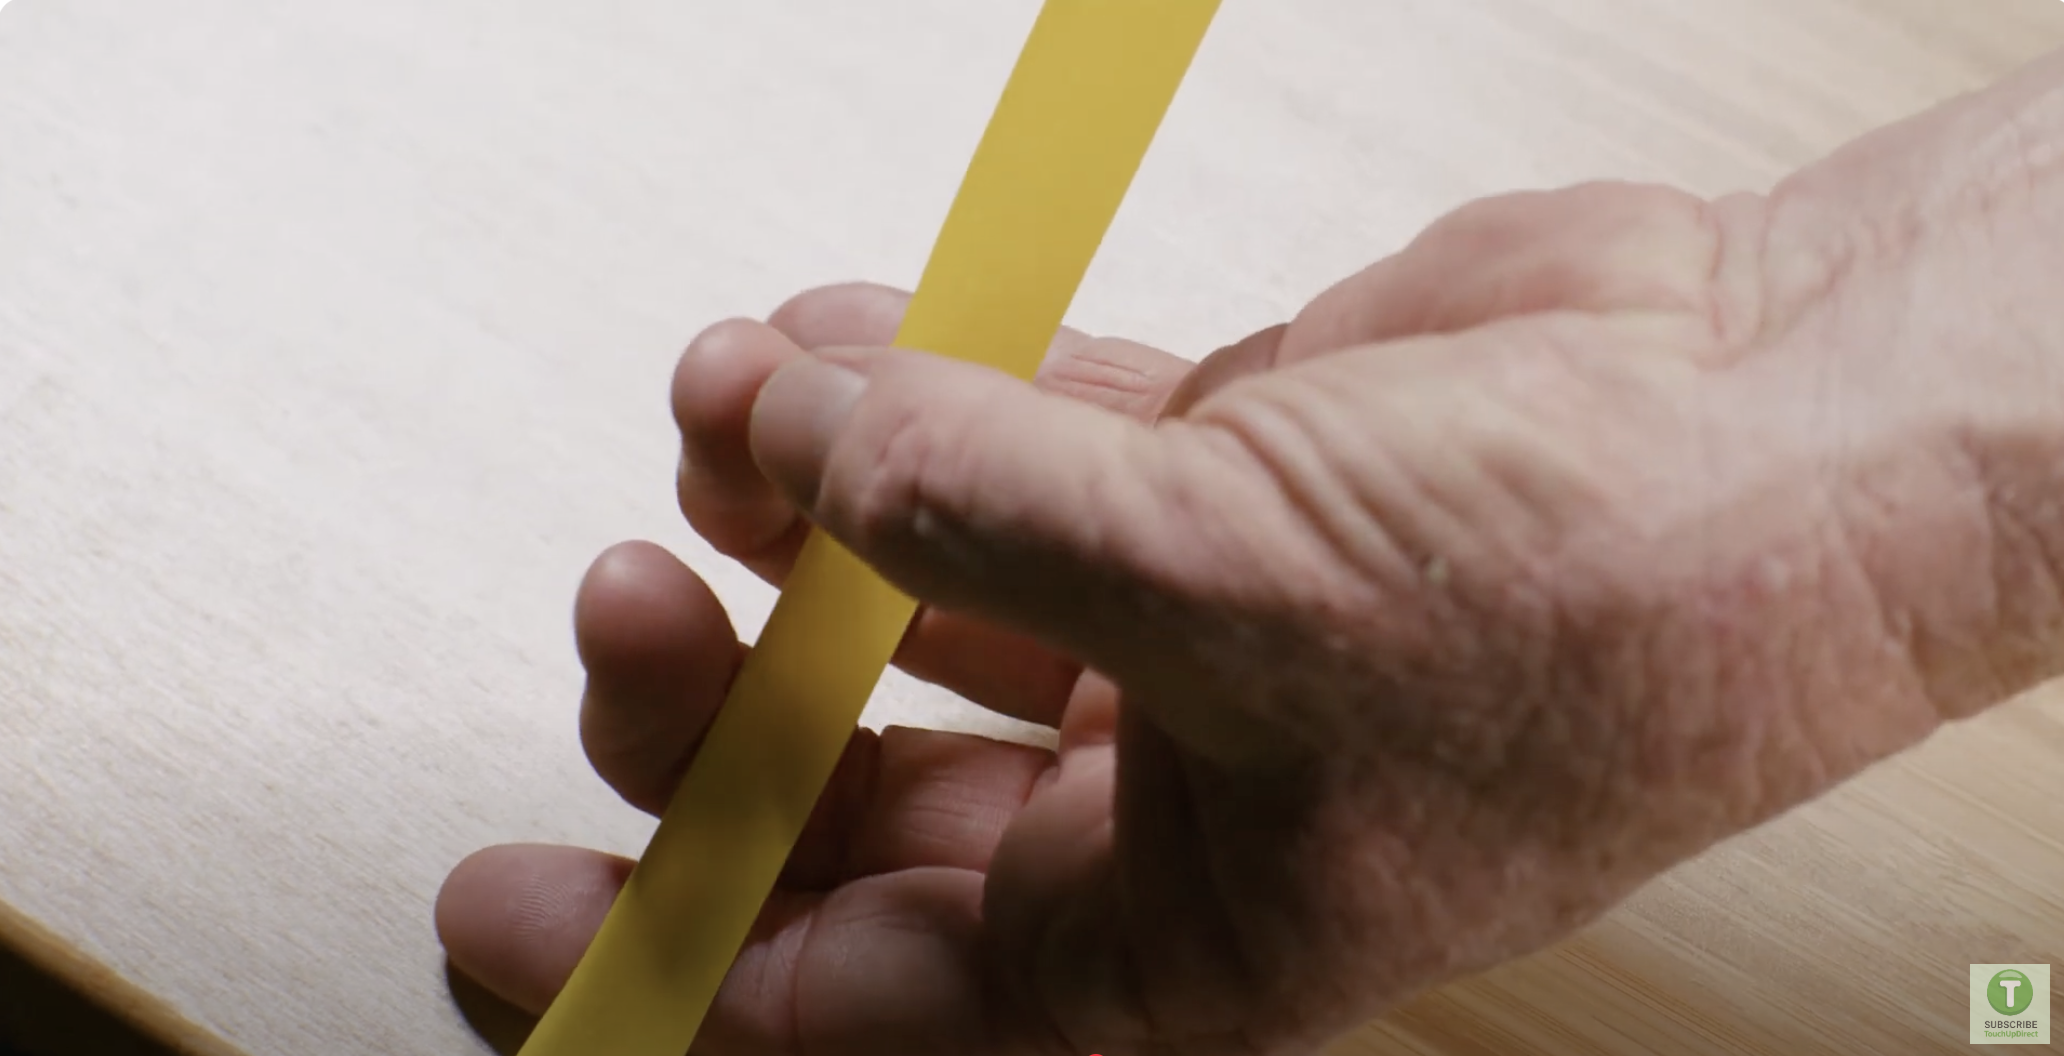
When painting, use folded tape(left)[10]or paper(right)[11], instead of tape, for masking, to avoid sharp tape lines.
wet sand using 1000->1500->2000->3000->5000 grit sandpaper, until the transition cannot be felt with finger. If your finger feels the transition, it will be reflected on the buffed finish.
Finally, buff with cutting compound and polish compound.
References
[2] Automotive paint – Wikipedia
[3] Waterborne Paint
[5] The Best Rattle Can Car Paintjob! – YouTube
[6] How to Repair and Remove Dents from your Car (DIY) – YouTube
[7] Chris Petris (2012). How to Restore Your Corvette, 1963–1967. CarTech Inc. pp. 63–. ISBN 978-1-934709-76-4.
[8] Dupli-color clear coat makes your paint job have a yellow tinge : r/cars
[9] TouchUpDirect | Paint Order and Dry Time Guide
[10] How To Avoid Hard Paint Edge With Aerosol Paint Can – YouTube
[11] How to Repair Rust on Your Car Without Welding (No Special Tools Needed) – YouTube
[12] How to properly spray aerosol paint, to avoid spitting and splatter

发表回复/Leave a Reply